PREPPER: The First 5 Items That Should Be In EVERYONE’S Everyday Carry
This blog is LOADED with the latest from the world of prepping...

You likely already know that what you carry with you on a daily basis is influenced by whether you live in the city, in a small town or on a farm, as well as by the job you have and the mode of transportation you use.
Nevertheless, there are a few everyday carry (EDC) items that should be in everyone’s pockets, purses, briefcases and so on. Here are five:
1. The band-aid
I took part in an experts’ round-up a while back, which is in essence a mega-article where they take survival “gurus” and ask them what the most important survival item is. Everyone said knives and multi-tools, but I said band-aid.
Why? You never know when you might get a cut or a bruise. It is much more likely than landing in the middle of social unrest and having to make your way home through angry mobs and tear gas. Even then, you could still get injured and need to patch yourself up.
I carry a band-aid in each wallet, in my gym bag and, of course, a few in my car. They’re cheap, lightweight and small.
2. The phone*
Duh, everyone carries a phone, right? Maybe, but is your phone prepared? I’m talking about loading it up with survival eBooks, GPS apps, offline maps and so on.
The Survival Water Filter That Fits In Your POCKET!
If you live on a farm or spend a lot of time outdoors or on construction sites, do you have a rugged phone, or at least a shock-absorbent case?
Whether or not you’re a HAM radio enthusiast or have a couple of walkie-talkies in the trunk of your car, your phone is likely to be the thing you use to call for help in an emergency or to make sure your family is safe.
3. Cash
You don’t have to believe ATM machines will stop functioning in a disaster situation. You should always have some cash on you, because it can get you out of a pickle fast. It’s accepted everywhere.
4. A pocket knife

There’s nothing like a knife to make you feel safer. Well, maybe a gun, but not every location allows it to be legally carried. A pocket knife is the next best thing. It can help you escape an attacker, and you can use it to cut and open things.
Whether you sleep with a gun under your pillow or you think guns are evil, a pocket knife can be your everyday best friend.
5. A fire-starting device
It doesn’t matter if it’s a lighter or a magnesium fire-starter, the ability to ignite fire should never be ignored. You can use fire in a variety of survival situations: to signal someone, to cook a meal, and, of course, to keep you warm.
Get Out Of The Rat-Race And Make Money Off-Grid!
So there you have it: The minimum number of EDC items (according to my humble opinion). Now, I know I left out things like your house keys, but I don’t really consider those to be survival items. I also know you can add dozens of other things to your EDC, and I encourage you to do so.
You can build on them by adding things such as:
- a larger wallet to fit more items.
- a mini first-aid kit.
- a credit card shaped Fresnel lens
- a multi-tool
- a compass
- a concealed carry revolver
- … and so on
Starting your off-grid living with solar power
 Harnessing
the sun’s power has become a popular trend in the last ten years and we
now have a large array of options for powering our homes using solar
power. Living off the grid requires a lot of work and innovation in
order to reach a certain level of self-sufficiency. Things get easier if
you are able to harness the power of the sun and use it for all your
needs.
Harnessing
the sun’s power has become a popular trend in the last ten years and we
now have a large array of options for powering our homes using solar
power. Living off the grid requires a lot of work and innovation in
order to reach a certain level of self-sufficiency. Things get easier if
you are able to harness the power of the sun and use it for all your
needs.From passive cooling to batch solar water heaters, everything is now available when it comes to DIY solar power projects. People are beginning to understand that solar power is not as complicated as certain individuals would want you to believe. This is a technology that has become extremely accessible in our modern times and you just need a few basic skills in order to make your own project.
If you plan to use solar power for your off-grid living or if you want to cut your electricity bill in half, here are a few suggestions to help you get started.
Know your needs
Solar power is considered a universal power source because it can be used in ways few people imagine. Before you start to make a shopping list for your project, you should start by assessing your needs. Do you plan to use solar power for cooking? For water heating or just use it to make enough electric power to keep you tools powered up when the grid goes down?There are stand-alone solar lighting systems that can be used to illuminate your home and even your courtyard. Solar ovens are becoming more and more popular and there are some clever designs that you can take with you anywhere you plan to bug out. You can also rely on water heaters, hot air collectors and space heating systems if you plan to use solar power for your off-grid systems.
It all depends on what you need to do and how much electric power you would need. The best part about harnessing the power of the sun is that you are not limited when building your power system. For example, you can always add more solar panels and extend your battery bank.
Learn the language
People think that solar power is complicated because they don’t bother to read and learn the solar energy-related terms. If you plan on using solar thermal applications, you should know that both passive and active systems exist. The passive systems are designed to not involve any mechanical devices while the active systems (such as photovoltaic panels) are designed to use mechanical devices so that the energy is stored for future use. When you start reading about solar power you will discover terms like open or closed system, charge controllers and inventers and all sorts of terminologies that may be confusing at first. To know more about solar power terminology I recommend consulting the glossary the good people at Energy.gov put together.
Related article: Off-grid limitations that no one tells you about
Asses your off-grid site
You cannot install solar panels if your roof needs to be changed in the coming years, due to various factors. You will just increase the costs if you don’t fix the roof first, not to mention the possible discomfort of being left without power for the time needed to make the fixes. You should to a thorough assessment of your off-grid property and decide where the panels will be installed. You should check if there are any local codes that regulate these types of systems. You might live off the grid but you still need to respect the law, at least until it no longer applies. You need to find the right spot for your solar panels otherwise you risk of spending much more money on repairs and maintenance.
 Learn as much as you can about your solar systems
Once
you have the system installed, you should move to the next step:
gathering the right info to keep your panels up and running without
exterior help. After all, living off the grid requires for you to
develop all the needed skills to become self-sufficient in an austere
environment. If your panels get damaged due to a blizzard, wild animals
or any other uncontrollable factors, you should have spare parts or
materials, but also the knowledge and practical skills to replace them.
This is not hard to master and it requires time and dedication to learn
the ropes.
Build your own solar panels
As alternative energy is becoming more mainstream, you can find a lot of DIY materials available at your local home center or online. Solar power has gained a lot of popularity due to visionary people such as Elon Musk and people are beginning to understand the potential of this unlimited source of energy. Materials and guidance is also available through specialty sellers and many organizations offer training, news and all sort of resources to help you get started. If you plan on building your own solar panels, go with something easy, something that you are able to build and maintain without professional help.
Related reading: How to handle refrigerator food when the power goes out
Solar power is all about conservation
While it is possible to keep an entire household powered with today’s technology, solar power teaches you how to embrace conservation. An off-grid life should be driven by self-reliance and in you can’t live off the grid if you aren’t self-sufficient, unless you have a huge disposable budget. If that’s not the case, efficiency becomes the number one step to self-reliance. Every task involving solar power should be as maximized as possible and cutting energy demands will become a lifestyle. Turning off electronics and improving your home’s insulation can lower your power needs considerably. You have to think of it this way, the better you are able to conserve energy, the lower the system you need to install for your home.Commercial system recommendations:
Here are a few recommendations for solar power kits that can be installed and used by anyone:- Goal Zero 31901 Yeti 1250 Silver/Black XX-Large Solar Generator, Wattage 1,200. Able to power lights, tools, refrigerators, freezers and health care equipment.
- Wagan (EL2547) Solar e Power Cube 1500 Plus, Wattage 1,500. A simple all in one unit is ready to be used as soon as it is charged.
- KISAE 40400 1800-Watt Power Kit with 40-Watt Solar Panel, Wattage 1,800. Complete solar power supply, ideal for your bug-out vehicle or an RV used as a bug out shelter.
Preparing For a CME and the After Effects
As preppers we tend to focus more on disaster scenarios that are more down to earth, but preparing for a CME and the after affects could turn into something “down to earth.” As we we’re watching Doomsday: 10 Ways the World Will End on the History Channel some of these disasters from outer space are a little far fetched for even my paranoid brain to handle.
CME’s (Coronal Mass Ejections) happen more often than you think, but most of the time we are not in the path of this plasma ejection. A little over 150 years ago we were in the path of a CME named the Carrington event (1859) and lucky for us the damage was minimal.In 1989 a small scale CME blacked out Quebec, and in 2012 there was an enormous CME, but that one just missed us by about 2 weeks. What would a Carrington scale event look like now? How would our electric grid and society in general handle an event like this?
The White House recently put out an executive order about Coordinating Efforts to Prepare the Nation for Space Weather Events. Here is an excerpt of that…
Government warning: Extreme space weather
events — those that could significantly degrade critical infrastructure —
could disable large portions of the electrical power grid, resulting in
cascading failures that would effect key services such as water supply,
healthcare, and transportation. Space weather has the potential to
simultaneously effect and disrupt health and safety across entire
continents. Successfully preparing for space weather events is an
all-of-nation endeavor that requires partnerships across governments,
emergency managers, academia, the media, the insurance industry,
non-profits, and the private sector. It is the policy of the United
States to prepare for space weather events to minimize the extent of
economic loss and human hardship.
What is a CME (Coronal Mass Ejection)
Basically, it’s a blob of the sun getting burst into space in the direction of the earth. For a more scientific explanation have a look at this article here.How long would it take for a CME to reach the earth? And would we be able to prepare? CMEs typically reach Earth one to five days after leaving the Sun. I would assume that the government or NASA would let us know that this was about to happen, because you would think it’s in their best interest to keep the children happy…but I wouldn’t be shocked if the opposite were true.
Even if we do get warning, and have a few days to prepare, I’m not so sure that there is a lot that can be done on a large scale. As individuals, we would be able to protects some of our personal electronics by using Faraday Cages and shielding them, but the electric grid would still be down, and we wouldn’t be able to power them.
SPP175 Preparing For a CME and the After Effects

Podcast: Play in new window | Download
In the show this week we went into detail about the show !0 Ways the
World Will End, and our thoughts on how they did. Here are some of the
show notes, but like I always say, listen to the show for more
information about all of this.What Initial Damage Would a CME Do
As I said earlier, it all depends on the magnitude of the CME, if it as large as the Carrington event, the power grid would be toast. The power won’t just go out, there will be a massive power surge meaning everything that is plugged in will be surged, and potentially cause fires.- Transformers will be toast as well, and they take 2 years to produce. This is especially important because and we have no backups and are only produced in Germany and South Korea. This means the grid could be down for a very long time.
- The fuel rods that power the worlds 400 Nuclear reactors must be kept cool 24 hours a day. These are kept cool by water, water pumped in by electricity. These plants have emergency generators that will last about 72 hours, and then battery systems that will last about a week.
- Cars might become damaged, but contrary to popular belief it is hard to say if automobiles would be completely useless. Although getting fuel for them might be impossible.
- Planes probably wouldn’t just fall from the sky, but runway lights and gps would be gone.
- Critical infrastructure would be affected. Losing the electrical grid could be more deadly than nuclear war.
- The modern food system is completely dependent on electricity. From growing, to harvesting, to transporting, to refrigerating.
- Supermarkets become battlegrounds. We all probably know this, but going to the grocery store could be a life and death situation.
- Cash on hand is just the first problem. The entire banking system is electronic, and it could either be gone, or inaccessible.
- No electric pumps = No running water, and no gasoline and no sewage. disease and sickness could become rampant because of lack of sanitation.
- There would be fires from short circuits from anything electrical. On a small scale this could be our toasters, on a larger scale this could be disastrous.
Would Electronics Not Plugged in Be Affected?
According to Modern Survival Blog:
“The reason why the device does not have
to be plugged in to become damaged is because of what actually happens…
The energy from the EMP pulse wave will melt down the transistor
‘junctions’ within semiconductor electronics. You could have a portable
shortwave radio sitting on your desk, not plugged into anything at all,
and as the invisible wave strikes it, it will fry.”
Short Term Effects of a CME
- A total collapse of civilization. It will literally be every man/woman for themselves. People WILL be fighting for resources, Martial Law WILL be enacted, and most of the population WILL die off.
- The show talks about how people will head out into the woods hunting, and how most people have never been hunting in their lives. This will cause many problems, not to mention the hunter gatherer lifestyle is not sustainable for 320 million people.
- After a couple of weeks, we will basically start devolving into a tribal state. This would literally be a Mad Max/Walking Dead scenario.
- After about 6 weeks people would be drinking from polluted water sources because they had no choice. Human waste, hospital waste, industrial waste back flowing into lakes and rivers.
- Extreme heat and extreme cold will kill people as well.
- The show estimates that the world’s population will be reduced from 7 billion to 2 billion in a little over a month. That means 2 out of 3 people will die because of our dependence on electricity.
The Aftermath
In just 1 year, there would be less than 1 billion people still alive across the planet…and that might be a generous guess.Most of us think about what we would do immediately following some sort of shtf event, and for good reason. We need to be able to survive a year to be able to rebuild afterword’s.
One year after this large CME the remaining people will have fought off bandits, protected their resources and been through more in one year, than they have in their entire life.
Most of the danger would be gone at this point…for the most part, because the only people who survived would be the ones who knew how to survive. Alternative energy, gardening etc.
Groups, communities and small scale infrastructure would form as people started to rebuild.
At this point, all is not lost, it’s just an uphill battle. We have the knowledge; but we just won’t have the resources to do anything on a large scale.
The 5 Important First Aid Skills Your Kids Need to Know
First Aid skills for kids is something we may, as parents, want to shelter our children from. I know I worry that if I start talking about situations that would require first aid with my kids that I just may end up terrifying them. The protector in me wants to shelter my kids and allow them to enjoy life – free of worry and concern.

Yet, first aid emergencies are real – they do happen. And if a child finds themselves with an out-of-commission adult, their survival (and the adult’s) may be in their small hands. First aid skills for kids really are necessary.
I personally believe – quite strongly – that we often underestimate our children. They can learn much and absorb information far more quickly than adults in many cases. Yes, they will be limited by their small size, but we can empower them by teaching them first aid skills and letting them know we trust them to care for us in our time of need.
Knowing they have these skills – even if they never have to use them – will increase their self confidence and their compassion for others. Confidence and compassion are two qualities I certainly want for my children.
I believe there is a balance in these two ideas. There are ways to teach first aid to our kids, increase their self confidence and compassion without terrifying them or causing nightmares.
Today I have two lists for you:
- 6 tips for effectively teaching first aid to kids in non-scary ways
- 5 essential first aid skill to teach your children
First, the 6 tips for how to teach the first aid skills to your kids without giving them nightmares:
Tip #1: Narrate
Everyday life with kids will provide plenty of real life opportunities to use first aid skills – every bike crash, skinned knee, burned finger and more – provides a teaching moment.As you help your children with these “emergencies” verbally walk them through what you are doing.
Narrating is great for 3 reasons:“First, I’m going to use this clean cloth to push on your knee – that will stop the bleeding. Now I am gently washing it out so no dirty bugs decide they like living there. Now I’m going to put a bandaid on to keep the blood in and the bugs out.“
- It will help your kids stay calm if they are hurt and scared as they try to listen to your voice
- It allows you to model how to calmly care for someone who is injured (even if you are the one injured)
- It provides a way to indirectly teach your children first aid skills without sitting them down and talking about various scary situations
Tip #2: Play a game
While narrating real life is examples is effective, you don’t have much control over when such situations happen (you are trying to prevent them). In addition, bigger emergencies happen less frequently and you want your kids prepared for such things before they happen.One solution is “playing doctor.” Most young kids love this game. They see it as fun – not scary – just look at how many play doctor sets you can find on Amazon.
Pretend to be your child’s patient and help them figure out what to do to treat your “symptoms.” You could also have them be your patient and narrate what you are doing to help them with their “symptoms.”
As they learn and demonstrate a correct understanding of first aid skills, congratulate them! Let them know that they could use those amazing things they know in real life – if someone they loved was hurt.
Tip #3 – Read a book.
There are many books written on first aid that are specifically for kids. Most are colorful and fun – some include coloring pages or other activities. Young kids love to cuddle up as a parent reads to them and this creates positive feelings that can overcome the scary ones.You can find lots of kid’s first aid books on Amazon HERE.
Tip #4 – Use the Media
Discuss first aid situation that happen on the news (especially if they involve children) or in the cartoons that your kids watch. Ask them what they would do in that situation, what you think the child did right and / or what they could have done differently.I also found a great website for kids and first aid HERE from the British Red Cross.
The Red Cross has also teamed up with the DADA company to create a safety and first aid app for kids.
Tip # 5: Go to safety events available in your area
Take your kids to the fire station and let those “heros” teach them a bit about first aid. Find out if your local pool has any water safety classes. Check the local hospital for “teddy bear clinics.”Tip # 6: Take a First Aid Class with them
As your children get a little older, you may want to enroll them in a formal first aid class. A class taught by a non-family member, but taken with a parent or loved one can be seen a fun quality time by older children. I know my 9 year old twins love “dates” with mom or dad, so why not make the “date” something productive and empowering like a first aid class?Now, onto the 5 basic skills every child should know.
Please note that older children (those old enough to take a first aid class) can, and probably should, learn more advanced first aid skills, but every small child (from age 3 or 4 on) can learn the following:Skill #1: Calling for help
In the US, kids need to know how to call 911 (many other countries are 122 or 999. I believe Australia is 000). This one skill alone is HUGE. If kids can calmly call 911, the operator can often walk them through other things that need to be done.Kids should know:
- How to dial your local emergency number (with cell phones this includes unlocking the phone OR how to access the emergency call screen)
- How to “send” (start / initiate) the call once they have entered the number (not needed for a landline, but with cell phones you often have to press “the green phone button” or similar)
- Their address and phone number (most emergency calls are made on cell phones which means the operator may not be able to find your location)
- How to describe their location (This is useful if you are away from home at the time of the emergency – for example, I‘m near a 7-11 at a big park with a pool. I see a sign with the letters S A L T L A K E ). Most of the time, the operator will be able to find a general location (city), but your child may need to give specifics to help them find your exact location.
Use a pretend phone to have them “dial,” then “answer” and ask:
- What’s your emergency?
- Where are your calling from? Where do you live?”
- What’s your name?
- Who needs help?
- Is the person _________ (awake, throwing up, bleeding etc)?
- Please __________ (raise their head, get an icepack, push on the owie with a towel etc)
Skill #2: Finding a First Aid Kit
All children in your home should know where to find a first aid kit. If local adults come to help before an ambulance, your child can show them where to find live-saving supplies.As your children grow, you can teach them what the various supplies are for (maybe by “playing doctor”) and how to use them.
Skill #3: Controlling Bleeding
Severe bleeding can quickly become life threatening and even young children can find a clean cloth and apply pressure (push on the owie with the towel). Make sure they know NOT to remove the towel, but that they can add another on top of it if needed.Skill#4: Family Specific Emergencies
If someone if your family has a severe allergy, everyone (including children) should know where to find and how to use an epi-pen. Does anyone have diabetes or epilepsy etc? What do your children need to know in order to help those family members?Skill #5 – Hands only CPR
I saved this one for last as very young children may be able to understand the concept behind hands only CPR, but not be big enough or strong enough to perform it.But even young kids may be able to do more than we think they can with adrenaline running through their bodies. And older (7+ children) can like perform hands only CPR.
The American Heart Association says that only 32% of of out-of-hospital cardiac arrest victims are getting CPR from a bystander! We – as a society – need to increase that number. One way is to make certain our children know how to perform this life saving skill.
Hands-Only-CPR is simply CPR without breaths. It is so simple that ANYONE can learn it right from their home. The steps to Hands-Only CPR are simple: (1) call 9-1-1 and (2) push hard and fast (think of the beat to the disco song “Stayin Alive”) on the center of the chest until professional help arrives.
The First 10 Things Every New Prepper Should Do (Some of Them Are Free!)
Contaminated water caused a complete
loss of municipal services in both Ohio and West Virginia, resulting in
almost a million people vying for the stock in local stores.
A freak confluence of storms caused a
“Superstorm” that took out power to much of the Eastern Seaboard,
including New York City and the coastal parts of New Jersey. Nearly a
year later, some families were still without electricity to their homes.
Two winters in a row, a “polar
vortex” caused horrifyingly low temperatures and paired with winter
storms to make the mid-western US resemble the Artic Circle.
A small town in Missouri was under
siege twice in a few months due to a police shooting of a young black
man, and the officer’s subsequent acquittal.
Job loss and poverty is at an all-time high.
A deadly virus that everyone thought
would be relegated to the distant regions of Africa was diagnosed here
in the US, not just once, but multiple times.
Now, read that and try to tell me that disasters don’t happen. Try
to say that it’s impossible that they’d happen to you. If you say this,
you’re deluding yourself because the reality is too unpleasant, and we
both know it. If you’d like to continue deluding yourself, thank you for
stopping by. Enjoy the articles about wholesome food, and pretend not
to notice the articles that urge you to take responsibility for yourself
and your family.However, if you’re ready to accept this fact, read on. I’ll tell you how to get started in a way that isn’t overwhelming. No bunkers, no wearing of tinfoil, no filtering and drinking of pee, and no building of Arks will be mentioned. That stuff is all in Prepping 201. (Kidding!)
How to Get Started Prepping
When you begin reading websites about prepping, sometimes it can be overwhelming. You see people talking about their one-year food supplies, their bug-out lodges, their ammo collection, and their homestead that is so far out in the wilderness that they have to climb a big pine tree on top of the mountain to get an internet connection and boast online about their seclusion.Most preppers are just regular folks with a self-reliant mindset.
I’m here to tell you, getting started does not require a $20,000 investment or your children feverishly packing beans and rice into Ziplock bags late into the night.
There are 10 simple things you can do to get started. Lots of them are free and if you apply yourself, you can get started on all 10 steps in less than a week. All of the highlighted text is a link that will take you to related resources so you can learn more.
#1. Fill up a whole bunch of empty bottles with water.
If you haven’t taken out the recycling yet this week, don’t! You can use those empty two liter soda pop bottles and gallon water bottles to stock up on a drinking water supply. Count on a gallon a day per human and pet. (Two 2-liter bottles are approximately a gallon). If you don’t have any containers you can fill, you can buy 5 gallon jugs of water at most grocery stores or Wal-mart. Most of the time, you’ll pay well under $20 for a full jug of water. Five of those will keep a family of 4 in drinking water for just over a week, should it be required. Add to your supply each week, and soon you’ll have a month supply, quietly sitting there in your basement. Here’s an infographic to get you started on safely storing water.#2. Bookmark some websites.
The internet is a wonderful place, and best of all, this knowledge can be found for FREE! The more you know about crisis situations, the more ready you will be to face them. Some sites are friendlier to beginners than others, so if you stumble upon a forum where people seem less than enthusiastic about helping people who are just starting out, don’t let it get you down. Move on and find a site that makes you feel comfortable. Following are some of my favorites, and the link will take you to a good starting point on these sites. In no particular order:#3. Take a look at your budget.
What? Budgets don’t sound very prepperly! But how do you expect to pay for all of those beans, bullets, and band-aids if you don’t make some adjustments to your spending and shopping habits? Here are some suggestions on ways to put money aside for prepping, and here are some ideas on creating a budget, and most importantly, sticking to it.#4. Inventory your food supply, then start building your stockpile.
You probably have more food on hand than you realize you do. Before you go out and spend lots of money at the grocery store, it’s important to go through your cupboards, pull things out, and get organized. You don’t know what you need until you know what you have. Be sure to put things away in an organized fashion so you can find what you need, when you need it. Now that you know what you have, you can fill in the holes. You can’t expect to have a 1-year food supply all at once. Here’s how I built a healthy food supply in 3 months, while on a pretty tight budget. This will help you get the idea of how to build your stockpile. Resist the urge to stock up on nutritionally useless foods like Ramen noodles and macaroni and cheese. If there is a situation going on in which you must rely solely on your stockpile, you will want to be nourished, not just filled up. If you want to build a one-month food supply super-fast, here’s how to create it with a few clicks of the mouse.#5. Have a drill.
The absolute best way to know what you need during an emergency is to simulate a crisis. Get your family on board and spend a weekend without power and running water. Keep a list going for the entire weekend so that you can note what needs arose. (Leave the breakers on for the refrigerator and freezer – you don’t want to potentially have your food spoil.) Can you make coffee and food? Can you keep warm in the winter and cool in the summer? Can you keep the kids entertained?#6. Prep for a power outage.
With most disasters comes a power outage, just to up the challenge ante. Sometimes the power outages are the disaster all by themselves. Remember about 5 years ago when a freak ice storm knocked out the power in Arkansas and Missouri for over a month? You want to be ready for stuff like that. Be sure you have food that doesn’t require cooking, light sources (hint: think solar garden stakes), a way to stay warm or cool, and a way to salvage the food in your fridge and freezer. Figure out a cooking method that doesn’t require electricity in the event that the outage lasts more than a few days. Be ready with games and non-power dependent activities to keep the kids (and by default, the parents) sane.#7. Figure out how to use the bathroom if the toilet doesn’t flush.
In an all-out disaster that shuts down municipal water supplies, you may find yourself in a situation where the toilet won’t flush. At times like this, you’ll want to shut off the main to your house, because you could end up with other people’s waste backing up through the lines. A quick, inexpensive solution is to turn your toilet into a litter box for humans. Drain the water from the bowl, then line it with a very heavy contractor’s garbage bag. Place some kitty litter in the bottom of it. When someone uses the bathroom, they should put a new scoop of litter on top of their waste. It’s vital to make sure the bag doesn’t get too heavy to carry without ripping. Seal the full bags well, then store them outside until service resumes. If you must use other disposal methods, the safest way to get rid of it is to bury it far from water sources or gardens.#8. Prep for an evacuation.
Now you need to pack a bug-out bag. If budget is a concern, use bags you already have along with supplies that you already have. The important thing is to have this stuff organized and be ready to go at a moment’s notice. Have a list of last minute items so that you know what you need. It’s better to think this through when you’re calm, not when the clock is ticking towards disaster. You’ll want things like personal documents, extra medication, comfort items for children, and survival supplies that could get you through 3 days away from home. To take a look at the ultimate prepper’s bug out bag, look at this one from Graywolf Survival.#9. Be prepared to defend your home and family.
It is an unfortunate but unavoidable truth that disasters bring out the worst in a lot of people. (Remember Ferguson? This wasn’t even a disaster, it was an unpopular verdict.)This truth is what turns a lot of people off from prepping. They can understand the need for having a few cans of food and some extra toilet paper, but they’re so immersed in cognitive dissonance that they can’t wrap their brains around the possibility of civil unrest. You do NOT want to be one of those families who bury their heads in the sand. You can have a 10-year supply of food, water, and medicine, but if you can’t defend it, you don’t own it. The article The Anatomy of a Breakdown explains the predictable patterns of social unrest. The best way to win a fight is to avoid getting into that fight in the first place. Secure your home#10. Build your resource library.
This is where some money could come into play. Most of the time, people in the preparedness world like to have hard copies of important information. This way, if the power goes out and you can’t access the internet or recharge your Kindle, you still have access to vital advice. Some of these books are for just such an event, while others are guides to building your self-reliance skills.- The Prepper’s Blueprint: The Step-By-Step Guide To Help You Through Any Disaster
(This is the be-all and end-all Bible of prepping)
- The Pantry Primer: A Prepper’s Guide to Whole Food on a Half-Price Budget
(This is my newest book, which outlines building your pantry while on a strict budget)
- The Encyclopedia of Country Living, 40th Anniversary Edition: The Original Manual of Living Off the Land & Doing It Yourself
- Prepper’s Home Defense: Security Strategies to Protect Your Family by Any Means Necessary
- SAS Survival Guide: How to Survive in the Wild, on Land or Sea (Collins GEM)
- How to Survive the End of the World as We Know It: Tactics, Techniques, and Technologies for Uncertain Times
- The Prepper’s Pocket Guide: 101 Easy Things You Can Do to Ready Your Home for a Disaster
- The Survival Medicine Handbook: A Guide for When Help is Not on the Way
- The Organic Canner
What are you waiting for?
If you’re new to this, there’s no better time to start than right this minute.Go through the list and do the free things first. Do all of the plotting and planning second, and then put your plans into action as your budget allows. Whatever you do, stop waiting around. Disasters won’t wait until it’s a convenient time for you.
If you a seasoned prepper, please share your inexpensive start-up ideas for newbie preppers in the comments below. If you have friends and loved ones you’d like to help get started, send them this article. It’s loaded with budget-friendly links to start them on their journey. Help encourage people to join our community of self-reliance!
The 7 Best Rifles if You Want Cheap Ammo

When it comes to defending your home or harvesting big game, it’s time to go to the rifle. Handguns may be more convenient to carry for personal defense, but except for the most powerful Magnum cartridges, their performance is marginal. Rifles beat them in the accuracy department, too.
If you have rifles that you treasure but find that it can be expensive to feed them, then check out these seven rifles that can help keep you proficient without breaking the bank.
1. Ruger 10/22
As you likely suspected, this list has to start with a 22. It is the cheapest rifle on the market, and many fundamentals of rifle shooting can be duplicated with a rim-fire. We like the 10/22 because even someone lacking in gunsmith skills can customize these rifles with ease.
If your main rifle is a lever action, you can substitute the 10/22 for a Henry or if ARs are you thing, the S&W MP15/22 might be more to your liking. Maybe you roll with a bolt gun; we are partial to the Savage Mk II. Companies like Walther and German Sport Guns offer rim-fire versions of HK MP5s, AK-47s and a few others. If none of these appeal to you, you can usually find a 22 conversion kit for your AR-15 and possibly some other rifles. The key is that you have options.
Although supply has been short in many parts of the country, if you luck out and buy in the right quantity, you can expect to pay as low as 5 cents a round. It may run higher by a few cents depending on your area. Supply is improving. Stock up when you can, but don’t be a neckbearding hoarder about it.
2. Colt M4 Expanse
Sure, there are other rifles out there like the Tavor, Galil, Steyr AUG, Ruger Mini-14, the SIG MCX and hundreds of AR-15 variants, but a Colt M4 Expanse is a sub-$700 rifle made by the company that put the AR on the map. You can get quality rifles from your manufacturer of choice, but the key is to get one chambered in 5.56. If you hate black rifles, you can find a number of bolt-action rifles chambered in this caliber, as well.
Be Prepared. Learn The Best Ways To Hide Your Guns.
For many people this is their primary long gun round, and we have seen it as cheap as $2 a box of 20. Average price is probably twice that or a little bit more.
If “black rifles” are not your thing, there is the Ruger Mini-14. Current versions are more accurate than their predecessors. If you have no use for a semiautomatic rifle, a number of companies make bolt-action and single-shot rifles in 223 Remington/5.56 NATO. This diversity is what lends the round its popularity.
3. Century Arms RAS-47
Some people might say SKS, but we have always preferred the AK platform. Either way, we like the 7.62 X 39 because it is cheap to shoot and can usually be found in great quantities. Average street price hovers around 20 to 25 cents a round.
We like Century’s AKs, whether it is the RAS-47 or one of the Yugoslavian imports (although those rifles lack chrome lined bores). Lovers of traditional stocks over pistol grips may prefer an SKS, and those who do not like former Com-Bloc designs can find an AR-15 or Ruger Mini-30 chambered in this caliber that performs much like the 30-30 Winchester.
4. AK-74
Similar to the last rifle is the smaller bored AK-74 chambered in 5.45 X 39. They are a bit harder to find than the AK-47, especially in our area.
I actually bought one of these rifles a few years back for the very reason I wrote this article. Having gone through numerous “rifle scares” and “panic buying sprees” over the past 30 years, I visited a gun shop that had several cases of 5.45 marked down to $88. The reason? They had problems getting rifles in stock. I picked up four cases and happened upon a rifle within a few months after that for a good price.
The price of ammunition has definitely increased since then, and it is on par with the 7.62X39 in the 20 to 25 cents range.
There are upper receivers and AR-15 variants chambered in this round as well as some old East German bolt-action rifles floating around out there. There have been rumors of conversion kits for the Israeli Tavor rifle and others for some time, but we have yet to see them.
5. Beretta Storm
Currently the most affordable center-fire pistol round is the 9mm Luger. Whether it is military surplus ammunition, Winchester White Box, or remanufactured ammo, 9mm is here to stay, and prices are reflecting this. We have seen it as cheap as $13 for a box of 100 recently. Beretta makes a carbine chambered in 9mm that should be part of everyone’s preps for the gun department, particularly if you have a number of 9mm handguns.
Some question the wisdom of a pistol caliber carbine. We like them in 9mm for their low recoil, ability to suppress and inexpensive ammunition. If you cannot abide a Beretta, you can find HK pattern rifles, Uzi carbines, ARs chambered in 9mm and Kel-Tec’s folding Sub-2000 rifle.
6. Rossi Model 92
We are looking at the 357 Magnum version, as it allows you to shoot the cheaper 38 Special round. If you have a 38 Special or 357 Magnum revolver, then this carbine makes a lot of sense.
Like any straight wall revolver cartridge, the 38 Special represents extreme low cost for re-loaders. We only caution that you avoid the bullets seated flush or close to flush with the case mouth for use in a lever-action rifle. They will not feed and the rifle will think it’s been stocked with empty cases.
There are other lever-action rifles available and a few pump-action versions were made, but we find Rossi’s guns to have the most value.
7. Yugo M98
With the prices of K-98 and VZ-24 rifles going through the roof, we thought we would clue you in on one that is not as expensive, especially if you can live with a straight bolt handle.
Ammunition performance of 8mm Mauser is on par with that of 30-06 or another low-cost round, the 7.62 X 54R. Military surplus ammunition is still relatively cheap, at just south of 30 cents a round.
How to Build a Prepper’s Medical Emergency Kit on a Budget

Prepare for any disaster step-by-step
Build Your Own: Four Essential Medical Categories to Concentrate On
The four general categories you will want to take into consideration for your medical kit preparations are: ointment, bandages, tools and medicine. Knowing the necessary components for each category will help you to form the most cost-effective kit.Ointment
The first and most important in this category is antiseptic wipes, like iodine wipes or alcohol-based wipes. In addition to wipes, you may also want to include an antibacterial ointment, like bacitracin. These are other ointments you may also find valuable:- Hand-sanitizing gel
- Insect repellent
- Insect sting relief treatment
- Iodine liquid
- Sunscreen
- Lip balm
- Biodegradable soap
- Collapsible water sink or basin
- Water-treatment chemicals
Bandages
You want to have bandages that can address any possible injury that may arise. Keep in mind that a person can die after just 10-15 minutes if they are bleeding from a major artery; you will want to have sufficient bandages to stop blood flow and close the wound. Remember, the best thing you can do for an actively bleeding wound is to apply pressure until you are able to apply ointment or bandages. The Israeli Battle Bandage is a first-aid device commonly used for major wounds, and it’s only $9. You will also want to include the following bandages in your medical kit:- Blood-stopping (hemostatic) gauze
- Triangular cravat bandages
- SAM splint and finger splint
- Stretch-to-form bandages
- Liquid bandages
- Medical adhesive tape
- Band-aids (various sizes)
Tools
You are definitely going to want a suture kit as well as scissors and fine-point forceps to deal with critical injuries. You may want to consider buying paramedic shears in order to cut through clothing for injuries that require fast response time. Cotton-tipped swabs will be helpful for applying iodine liquid to wounds. In addition to these items, here are a few other tools that will likely be useful:- Multi-tool (or pocket knife)
- CPR mask
- Emergency heat-reflecting blanket
- Headlamp (or flashlight) with extra batteries
- Safety pins
- Industrial gloves (preferably non-latex)
- Needle-nose pliers
Medicine
There are a number of medications and treatments that you will want to consider packing in your medical emergency kit. Aloe Vera can be helpful as both as sun screen and a treatment for sunburns. You may also want injectable epinephrine, commonly known as an “Epipen” (only $7), to treat allergic reactions. Here are a number of other medications or treatments that one may require:- Antihistamines for allergic reactions
- Prescription medications
- Glucose to treat hypoglycemia
- Eye drops
- Aspirin
- Iodine tablets for water purification
- Multivitamins
10 Self Defense Mistakes that Can Endanger Your Life - Guest Post By Carmela Tyrell
Did you know that even experts in the field of self-defense
can make the same kind of mistakes that a novice might make? Invariably, the actions that put you in most
danger will always go back to a handful of fundamental things that you
overlooked for one reason or another.
Avoiding these ten mistakes will be of primary importance no matter what
your age, skill level, or income status may be.
Lack of Balanced Situation Awareness
When many people hear about situation awareness, the first
thing they see as a liability is a basic lack of awareness of what is going
on. Many do not realize that
hyper-vigilance is just as deadly because when you try to focus on every little
detail, you may well miss the most important ones that signal danger. Perhaps it can be said that situation
awareness isn't just about how much you take in about your surroundings, but
how you process that information.
Each and every day, you have a chance to improve your pure
ability to observe what is going on around you. However, without some training
and guidance from professionals, it will be a bit harder to avoid falling into
the traps of over or under vigilance.
Martial arts, self-defense classes, and other courses designed to
improve situation awareness may all be of help to you. Even if you think you have good observation
skills and a sense of your surroundings, never overlook an opportunity to
improve or find out where your weak points may be.
Advertising Your Abilities
Over the years, I can't count the number of times people
have talked on and on about how many black belts they have, how good they are
at wrestling or the number of ways they can hurt an "enemy" in 5
seconds or less. Aside from resisting
the urge to yawn, I usually figure there is probably one more method that would
completely blindside that person. When
someone who boasts about his or her tactical skills, they give away important
information that can be used by anyone that is searching for a baseline level
to achieve. Just because you know how to
disarm an attacker, there is no need to broadcast it. Keep those who would harm you guessing about
what you really can or can't do.
Now, some people may disagree with this and say that it is
important to give people a warning.
Quite frankly, if someone feels they need to give that kind of warning
in a routine conversation, there is either something wrong with their situation
awareness or the people around them are truly not safe to be around. Either way, advertising self-defense skills
is not a viable route to securing personal safety.
Revealing Your Weapons
Even though carrying a gun or knife may make you feel more
secure, revealing your weapons is not the wisest thing if you wish to use them
to the best advantage. Among other
things, if someone realizes you are carrying a weapon, you will lose any
element of surprise that may be available to you. Never forget that when the other person knows
what to expect from you, they will have time to come up with a plan to defeat
you. Aside from carrying weapons in open
view, here are some ways you may reveal your weapons in a way that reduces the
advantage of having them:
- Practicing in your home or local area, or where people will know what you have.
- Storing weapons (or a recognizable weapon cabinet) out in the open, or other areas that can be seen through a window
- Telling others about the weapons you have.
Traveling Alone or Too Far Away from Help
While traveling with two or more people, there is always a
chance that one of you can call for help if you are attacked. Needless to say, two or more people can
always fend off attackers more easily than one person. In addition, lone attackers or others with
less confidence are more easily deterred when they see a group.
It is also very important to remain in areas where others
can reach you to assist if needed. For
example, if you are out in someplace public and feel that someone is watching
you with ill intent, do not hesitate to ask for an escort to your vehicle. While a few yards may seem like a short
distance, the person closest to you always has the advantage. Never assume that someone else in the area
will respond, let alone come to your aid.
In the absence of a gun or other suitable weapon, staying away from
areas where you can be isolated from others is very important.
Not Leaving Your Travel Plans with Someone Trusted
Do you remember the days when you always had to tell mom or
dad where you were going, who you were with, and what time you expected to be home? As much as you may value your privacy as an
adult, letting trusted people know your travel plans is very important. At the very least, if you do come wind up in
harm's way, at least someone will know to call the police and can give some
ideas about where you may have been in the critical time window.
Failure to Practice Defense Techniques and Strategies
Just because you buy a weapon or took a self-defense class,
that does not mean you are always going to be ready to protect yourself in a
situation. Always practice your skills
so that you can respond faster and more effectively. Keeping yourself in the best possible
physical and mental condition is also very important.
Flashing Money, Jewelry, or Other Expensive Items
Have you ever won the lottery, received a beautiful piece of
jewelry, or purchased something that you were really proud of? If so, it's
perfectly natural to want to flash cash or show off all those expensive
items. While you may be thinking about
what your friends and family will think about your new treasures, thieves, and
other criminals will see a target ripe for the picking. Always avoid displaying any kind of wealth or
expensive items. As with weapons and
self-defense skills, what others don't know won't serve as a temptation to
them. Here are some other ways to keep
a low profile:
- Vehicles should not stand out.
- Don't spend too much at one time.
- Keep items in the car out of sight in places like the trunk.
- Do not unload vehicles out in the open or where neighbors and strangers can see you.
Excessive Alcohol or Drug Use that Make You Look Like an
Easy Target
Few things sabotage self-defense tactics and skills more
than alcohol or drug intoxication. When
you cannot think straight or perceive your environment properly, just about
anyone can steal from you, rape, or even kill you. Sadly, having a designated driver available,
or some other chaperon is no excuse to lose complete control of yourself to a
drug. If you must use drugs or alcohol,
make sure you stay below your safe limit.
Bad Clothing Choices
These days, there is no question that clothing choice is a
controversial topic. If you are a woman,
wearing too much or too little can be interpreted in all kinds of ways that
invite attack. By the same token, men that wear their pants too loose, or wear
garments that suggest gang activity can also send the wrong signal to people
that are looking for an easy target.
Since each community is a bit different, there are not any precise rules
about what to wear in order to reduce unwanted attention. Here are a few tips you can try out:
- Wear clothes that fit in with others in the area. For example, if you are going food shopping in a poor area of the city, don't wear expensive clothes.
- Always wear sensible shoes that you can run or kick in. Do not wear clothes that are hard to move in (like those loose pants), or that advertise you would make a good victim. These includes not dressing so far down that you might be perceived as a homeless person that no one would miss if something happened.
- Anything that can give another person a chance to start a conversation with you. While another person may just wish to compliment you or ask a question, it is also just as easy for a criminal to latch onto you and steer you away from others that could help you.
Lack of Variance in Routines or Travel Paths
Historically speaking, there are all kinds of movies about
ambushing trains, stagecoaches, and other vehicles that always traveled the
same route. By the same token, if you
have a stalker or some other kind of person that means harm, they may also seek
to ambush you. The best way to avoid
this problem is to be as unpredictable as possible when you are traveling. Take a different road, ride to work with a
friend, arrive early, or do something else to vary your routines as much as
possible.
It is also very important to remain aware of what is going
on in the neighborhoods surrounding yours.
Aside from getting a sense of what is going on in these areas, a few
excursions also make it easier to create variance in your travel paths. As you are traveling through strange areas,
it may also be easier to spot anyone that may have been following you around in
your local area because they will not fit in with the local population anymore
than you do.
Making mistakes when it comes to self-defense may be easier
than you realized. While it is not
always easy to avoid them at all times, you can still do your best and look for
ways to improve.
50 Organizing Tips for Food Storage & Emergency Supplies
Every year I have to reorganize my pantry at least twice – usually during the spring and fall. Our food choices change, our stockpiles change, we get new equipment, and everything has to change to accomodate it. So I’ve put together a list of organizing tips to help you with your challenges. Whether you’re an organizing pro or just getting started, I hope that one of these ideas helps you gain a little control over what can become preparedness clutter!
50+ Organizing Tips for Food Storage & Emergency Supplies
Place like items on the same shelf. Store your most used foods where they are easiest to access. Devise a system that works for you. I like to keep baking good stogether, fruit storage together (canned and dehydrated), soups together, grains together, etc. Some folks like to alphabetize because it’s how their brain works. Don’t be afraid to try a few diffrent ways until it clicks for you. Mark Expiration Dates with sharpie in a clearly visible location Rotate – first in first out is a good rule of thumb. It may be a pain after a shopping trip depending on what your shelves are like, but rotate through your food storage to ensure that you’re not stuck with old food. This even goes for that food you store but might not eat often (SPAM anyone?). Get it out of the cupboard occasionally and use it or donate it and bring in a fresh supply.Label everything! Have you ever picked up a mystery package from the freezer and can’t identify it? Think back to when you put it in the freezer and thought, “That won’t be hard to figure out later…” LABEL IT! (and let me tell you – you can get totally obsessed with labeling everything in your house with this guy! But I also just use a piece of masking tape and sharpie, too!)
Oldest foods up front to use first – this isn’t just about rotation, but about setting your pantry up in the first place. You should keep the oldest food to the front so that you can use it quickly.
Use totes for organzing same kinds of foods or packing in meal plans. Here are just a few ideas:
- Keep a tote for sewing supplies
- Keep a tote for first aid supplies
- Keep a tote for cleaning supplies, etc.
- Emergency kits for each member of the family
Tip
– don’t use the plastic totes for actual food storage unless you are
sure that it is completely airtight when closed and free from pest
invasion.
Use Food Grade 3 or 5 gallon buckets to store like items or “categories” or emergency kits. You can use the regular lids or invest in the Gamma Lids which help reduce oxygen and moisture from getting in. Here are just a few ideas:- Store single grains
- Store emergency kits
- Store like categories
- Create monthly meal plans
Repackage boxed items in more appropriate long term storage containers (vacuum sealed canning jars, mylar bags, vacuum sealed bags)
Use 55 gallon drums to store items – just remember a handtruck may be necessary to move, so be careful what you expect to store. There are a lot of different kinds of drums that can be used for hard goods as well as water. Keep an eye out and you may be able to get them for free! Just be careful to know their history and what was originally stored in them. You’d be amazed at how many clothes or linens you can store in a big drum.
Don’t store everything in one place. Store items throughout your house, in good storage areas where light and temperature fluctuations can’t hurt them.
Don’t store items that are sensitive to weather changes outdoors. Food products should be kept inside, but paper goods can be kept in outdoor storage as long as it is critter proof.
Keep a running list of your inventory always. Not only will it help you not overby in an area and potentially waste money and resources, it will allow you to see weak areas and plan accordingly.
Label buckets, bags and unidentifiable containers not only with names and expiration dates, but cooking instructions, too. You can print out the instructions or write them on an index card and tuck that into your package or tape it to the outside. It’s handy to have it in your food storage binder, but even better to have it right on the package.
Don’t overstuff totes or buckets with more than you can actually carry by hand or by tool.
Utilize unused space to store
- Behind the sofa
- Under side tables
- Closet floors
- Under beds

Utilize attic space for non-food items as long as stored in pest-resistent containers.
Utilize the back sides of doors with hanging racks to store more items.
Use a tackle box for emergency medical supplies and store under sink.
Use your stored coolers to store items in when not in use
Use a kid’s wagon to store and move storage throughout house (here’s our lesson on why we keep it!)
Use odd space in your home to install shelves and have extra storage space.
Line your open shelves. If you like using the pretty metal kitchen storage stations, use a thin sheet of styrafoam or plexiglass or other rigid material to line the shelves with to keep things from falling in between the slats. There are some specially made liners, but you could also use some of the inexpensive cutting boards you can get at the dollar store to convert, too (I did that for my Nesco Dehydrator, too!)
Try to use square storage canisters to not waste space – or at least try to organize with the same system to make storing on shelves easier.
Create shelving units unexpected places to add more storage. Think bin storage on your garage ceiling, removing the drywall and storing between studs, finding cubby holes in your house and putting in shelves. (Check out my Pinterest board all about organization in the garage)

Use bins from other storage systems (think garage or automotive) – Look how we used this magazine holder in our pantry.
Alphabetize things to make them easier to find.
Keep a notebook full of information on:
- What you have stored
- Where you have it stored
- Expiration dates or purchase dates especially for things like fuel, equipment, etc.
Use a bookshelf with a pretty fabric covering the front to store things in boxes and baskets.

(I didn’t tuck in the sides as I’d just added stuff to it before taking this photo – and while the fabric isn’t pretty, it blends into our wall color naturally so it isn’t as noticeable when you walk into the room. Behind it we keep all sorts of food storage and other sundries. On the side with the lamp, I actually have a hook and loop tab that connects the fabric edge to the bookshelf that keeps it tidy.)
Use sturdy shelving units. Cheap ones will bow, warp or break
- Don’t store more on shelving units than suggested
- Don’t store heavy items on top of shelving units
- Brace shelving units to the wall, if possible, to keep them from falling
Alternative Uses for Food Storage as Furniture!
- Create a ‘box spring’ of food storage containers for your mattress
- Create a tower of food storage items and drape with cloth, or place a square or round of MDF as a topper to create a side table.

30 Survival Skills Everyone Had 50 Years Ago
 As
we get engulfed more and more by this modern world, I wanted to review
30 survival skills that might have been lost in the last 50 years and
what they meant for survival. Only a few individuals are still holding
onto such skills and passing them on becomes difficult.
As
we get engulfed more and more by this modern world, I wanted to review
30 survival skills that might have been lost in the last 50 years and
what they meant for survival. Only a few individuals are still holding
onto such skills and passing them on becomes difficult.Although we live in a digital era and there are a lot of books providing information about the survival skills of our grandparents, I feel we aren’t celebrating their legacy enough. Most of these survival skills provide us with warmth, comfort, food and the knowledge to use sustainable resources in an environment that allows us to be ourselves. And yet, kids no longer learn about the old ways of living as they are handed everything they need and the system doesn’t allow room for self-sufficiency or off-grid living.
I wish that these survival skills would be passed on and I consider them as part of my own “bucket list” of survival skills. People should stop for a minute and look back at the old ways of doing things as this world we live in doesn’t provide you with opportunities to discover your true potential. If you’re spoon-fed constantly, you will never completely understand what you’re capable of and if you could survive when this modern society falls.
30 survival kills everyone knew 50 years ago:
- Light a fire with the bow drill technique. This has to be the absolute skill of bushcraft and it requires a lot of practice in order to master it. You need to have the proper stance, the right materials and you have to learn how to read your powder.
- Building the right shelter for the appropriate environment. People back then didn’t rely on Gore-Tex and all sorts of high-tech materials in order to stay warm and they had to use their knowledge and survival skills. Tents weren’t as complex as they are today and few could afford them. You had to learn about the huge variety of shelters you could make for your environment during the different seasons. They experimented with various designs and their long-term shelters allowed them to cook, eat and sleep inside.
Related reading: Planning a shelter in the wild
- Start a fire in any conditions. The wilderness environment has its own rules and having the ability to start a fire when the odds are against you, meant the difference between life and death. Nature doesn’t play by your rules and it’s neutral to your sufferance or your survival skills. It may provide you with the resources to survive, but you need to carry emergency fire lighting equipment with you and know how to use it.
- Learning to use an axe. If you spend a lot of time in the wilderness, an axe is one of the most satisfying tools to have and use. However, it is also a dangerous tool in the wrong hands and it can become lethal. Learning how to use an axe requires proper training and not only from books. Even more you need to learn how to look after it as it may become your main survival tool.
- Calculate your position using the sun and stars. You can calculate your longitude and latitude with a simple solar compass, the angle of the North Star and an equation of time table.
- Finding North without a compass.
You can find your sense of direction by learning the path of celestial
objects, but also by paying attention to what’s on the ground. The
shapes, shadows, sound and natural formation can all be used for various
natural navigation techniques.

- Navigate using a map and compass. Long before the invention of the GPS, people were teaching their kids how to navigate by using a map and compass. This is the cornerstone of wilderness travel and learning how to follow a compass bearing was one of the survival skills passed on from one generation to another.
- Provide food for yourself. This should be on every survival skills list and it requires all your concentration as it brings together all your field craft, tracking, hunting and practical skills. It doesn’t matter if you hunt and fish for meat or if you forage for edible plants. This is one of the survival skills that is hard, both physically and emotionally since failure is more present than success.
- Make water safe to drink. Drinking dirty water from an unknown environment can get you very sick. Back then Lifestraw filters were an unimaginable option and making water safe to drink was an essential survival skill.
- Build and understand the right type of fire. Making the right type of fire is more than creating the essential heat source and you must consider the use, the duration and other various particularities of fire making. When it comes to survival skills, you should master how to make more than one type of fire.
Suggested article: Eight Fire types you can make in the wild
- Using a flint and steel. Creating sparks with a flint and steel to start a fire may seem like a no-brainer for some, but things are never that simple. You must first make sure you have a good quality steel striker and a good sharp edge to your flint. You need a downward motion to shave off tiny shards of iron from your steel that combust and hopefully, will ignite your tinder.
- Our forefathers used many survival skills to subsist and tracking or “reading sign” is one of the ancient skills they left us. Tracking requires a keen sense of observation and it involves looking for deviation in the way things are supposed to look in their natural environment. If you spot something that looks out of place, you should stop and examine it further.
- Move silently. Although we now live in an environment controlled by speed and noise, learning to move silently in order to observe the world around you is one of the survival skills often overlooked. If you need to hunt or if you have to travel undetected, you should learn how to move without disturbing the environment around you and attract attention on yourself.
- Make a snare. This is one of the survival skills that our grandparents learned to master as it helped them catch small game, but also to get rid of rodents and other pests. Start with Youtube videos and practice every time you get the chance.
- How to prepare a mammal. Every hunter knows that game preparation is an important skill as you might not have the luxury of keeping your prey in proper condition. In the field, most mammal preparation is very similar; it’s mostly a matter of scale.

- Using animal tendons. This is one of the survival skills left to us by the Native Americans and using as much as possible of the animal was a way of showing respect to nature and the animal itself. Sinew makes a strong binding and it was used when cordage was not available.
- Fishing. When it comes to survival skills, fishing is seen mostly as a hobby due to all these modern fishing tools that make life easier for us. However, improvised fishing is another thing all together. Once you struggle with improvising bait, setting up the line and playing the waiting game, you will truly discover what survival fishing is all about.
- Using fish traps. While visiting a friend in the UK, I had the pleasure of seeing him build some fish traps, following the know-how he acquired during a survival course. As he puts it, using fish traps is a labor intensive method of acquiring fish as you need to build the trap, place it in the right spot and wait. But on the other hand, you can’t go wrong with this method if you traditional fishing is not for you.
Related article: Survival improvised fishing
- How to prepare a fish. Knowing how to fillet a fish and how to use the guts and all the other parts as bait or for other purposes is becoming a forgotten skill. If you catch your fish in the wilderness you need to know how to prepare it and how to make the most of it.
- How to prepare a bird. This is one of the survival skills that you need to master as you have much better chances of trapping or hunting birds rather than big game. The young generations fail to make the connection between a chicken and their KFC meal, but there are still some people out there who can remove the meat from a bird using just the hands.
- Improvised cooking. During wartime or a natural disaster, food shortages and lack of natural gas or electricity for cooking requires a great deal of improvisation. You will have to rely on your survival skills and upon back-to-basics cooking techniques used by your forefathers in order to survive.
- Make a variety of cordage. This is another one of the survival skills we lost to history and few people know that you can make string from stinging nettle or longer fibers. It’s not a complicated skill once you understand and master the learning curve. This video will show you how easy it is to make rope from grass.
- Learning different knots. While there are entire books on how to make various knots, in order to have a good start on your survival skills, you should learn by making the clove hitch. Go further with a couple of tensioning knots for tarps, the figure eight, bowline, the timber hitch and prusik knot.
- Identify the right tree for your needs. When it comes to tree identification you should start locally and learn which trees are useful for your needs and which could be dangerous if not handled properly. Start by paying attention to the general shape of the tree, the leaf structure and growth pattern. The bark details will also help you remember trees easily and establish their uses.
- Plant knowledge. As with trees, being able to tell plants apart will provide you with both food and medicine in the wilderness. Foraging includes not only using the plant, but also being able to transplant it or protect it for future generations.
- Making glues. Making glue in the wilderness can be as simple as mixing pine resin with a bit of bees wax. This is another one of the survival skills that would have been lost to time if it wasn’t for survivalists and bushcraft enthusiasts keeping it alive.
- Drill a hole without electricity. The pump drill was often used to drill holes and this technique has been used for almost everything. Although it can be difficult to master by beginners, once you spend enough time with it, you will be able to use it when there is no electricity.
- Wilderness first aid. As long as you look after yourself in an unknown environment, you should be able to prevent accidents and medical emergencies from happening. However, the more you are out, the higher the chance of getting injured or ill. Having first aid training should be basic knowledge for today’s generations, but you can take things even further. If you want to become a real survivalists you should attend to a wilderness first aid course. You will be able to learn how to treat various medical emergencies, but most importantly, you will learn how to improvise when resources are scarce.

- Training yourself mentally and physically. Our ancestors had the right type of fitness and a positive mental attitude that is hard to find these days. All because living and working outside makes it tough on you and teaches you to appreciate things more.
- Respect nature. I’ve always heard people say that if the brown stuff hits the fan, they will hunt and fish or get anything they require from nature. While this may be true for certain cases, the vast majority of people are trained to only consume. We are already destroying nature at a fast pace right now, when we have all the things we could possibly want. Imagine what would happen if people become desperate for food, or wood to cook their food or heat their homes. Our grandparents learned that you can’t exploit nature without consequences, but what about us?
21 Survival Uses For Paracord
Paracord used to be used as the suspension lines for parachutes. After landing on the ground soldiers would cut the cord from their chutes because they found a multitude of uses for the light weight, durable cordage. Today, paracord has become incredibly popular not only with the military but with the civilian sector as well.By Tinderwolf, a Contributing Author of SurvivalCache and SHTFBlog
Why Paracord?
The most commonly used type of paracord is type III. Type III has a minimum strength of five hundred and fifty pounds, which is why most people refer to it as 550 cord. Paracord is a nylon kernmantle rope which means there is an inner core of nylon strands incased by a nylon sheath.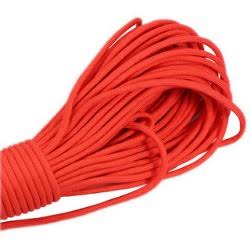
This type of rope construction gives way to its strength and the variety of tasks it can accomplish. Type III paracord generally has seven inner strands but can have up to nine. Given that it is made out of nylon, paracord is fairly elastic and mold resistant. One of the reasons it is so versatile is that you can cut the outer sheath and use the individual core strands as well. Years ago, paracord only come in black or olive drab but with its grown popularity you can now purchase paracord in virtually any color that you want.
Below is a list of how I have used paracord.
- Shoelaces
- A line to hang up wet clothes
- I have used one of the inner strands as fishing line and yes I did catch a bluegill. Some people have even made fly lures out of the paracord.
- I have braided ropes
- I have made monkey fists for the purpose of weighing down one end of my ropes. This makes the task of throwing a line over a tree branch or from a boat much easier.
- Bracelets, while stylish, can be undone for emergency cordage. I recommend a double cobra weave as you will have twice the amount of cordage available.
- Belts
- Lanyards, I caution that if you make or buy a paracord lanyard make sure it has a break away clasp or on it.
- Long gun slings
- I have used the inner strands and an upholstery needle to sew shut a rather large hole in one my packs and it has held for over a year now. I also sewed shut a hole in my driver’s side truck seat which due to climbing in and out, gets a lot of wear and tear. Six months later it is still holding strong.
- Rock slings
- Hammocks
- Tow lines, for vehicles and boats
- I have tied down loads in my truck bed
- Knife handles
- Keychains
- Bottle wraps
- Dog leashes
- Snares
- Dog collars
- Dental floss. While somewhat uncomfortable to use it will serve the purpose if you get popcorn stuck in your teeth around the campfire.
Conclusion
The uses for this cord are only limited by your imagination. Generally paracord is sold in either one hundred foot hanks, or one thousand foot spools. Personally, I like the one thousand foot spools because you can cut the length you want for a specific job in mind. If you are going to be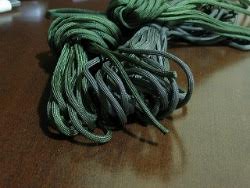
making other items from the cord, such as bracelets and slings, having the extra cord on hand in case you make a mistake is definitely worth having the spool on hand. Given it’s plurality of uses and durability, any survival scenario is improved by paracord. I would be very interested in hearing what you have all used paracord for and your experience with it. So sound off and keep making adventures!
13 Tips You Need To Get Your Family Ready For Winter
Whenever the TV weather reports tons of snow…I am so glad I moved away from it. Or at least the real heavy snow. We get a little here, but it melts very quickly. Last winter was not the normal winter where I live. We had so many neighbors with frozen pipes and ice on their north facing driveways. Yikes!
Get Your Family Ready For Winter:
1. Check Your Furnace/Heating System
If you missed the post about changing your Furnace Filters , here it is. We just had our furnace checked out. I am a little embarrassed to say it has been about 4 years since I had it serviced. I rationalized this because we only use it three or four months out of the year. We use our air conditioner a whole lot more than the gas furnace. Pick up few extra furnace filters and store them where you will see them and be prompted to remember to change them as needed. We will all save money and wear and tear on the furnace if it doesn’t have to work as hard to push the clean air through those filters. Just so you know, as I am typing this post today I really wish I had a wood burning stove. I love, love, love the smell of a wood burning stove. Blessings to those who have one…2. Gather Winter Wear
Place your winter gloves, winter coats, glove liners, ear muffs, hats, boots, scarves, etc. in one location so you don’t have to search for them when you see the snow falling outside or hear the weather report stating winter is here. They will be clean and ready to use to go shovel snow or scrape windows. I don’t even own a winter coat. BUT I have these fancy gloves with fake fur (bought on clearance) that keep my hands so warm! I have never owned one of those bulky coats. It’s just me, I know. I have a heavy wool sweater that works great for me. Even in a blizzard of snow……..3. Yard-Garden-Hoses
It’s that time of year when we need to cut down our bushes if required and rake out those leaves of fall. It’s also a perfect time to fertilize your trees, lawn, shrubs, and prep your garden for next year. When I got married and lived in a cold climate I quickly learned that all hoses need to be disconnected from the faucets outside. I have helped scoop more water out of basements than I care to admit. I have seen so many flooded homes from frozen pipes. More from the outside faucet than freezing temperatures indoors. Please unscrew your hoses….before the temperatures go below freezing. I still water my trees here in Southern Utah for about an hour a month because we don’t get the moisture like other areas in the country.4. Get Car Ready For Winter
Check your car battery and clean the cables. Get your car anti-freeze checked, the windshield washer fluid added as needed. Rotate your tires to snow tires if needed where you live. Throw the tire chains in the trunk, with a small shovel and kitty litter or salt to help get the car out of snow/ice if needed. Emergency Car Kit If you have any of those little windshield chips…get them repaired if possible. Heat and cold can often make them spread.5. Smoke Alarms-Carbon Monoxide Alarms
I love checking the smoke alarm batteries before they need to be replaced. I dust them and replace the batteries twice a year here. The heat seems to age batteries more in hot weather like we have here in Southern Utah. We have had to replace our smoke alarms three times in nine years. One thing to be aware of, replace your carbon monoxide unit every five years. Or at least check out the model you purchased. If you look at the fine print…it says replace in five years, typically. Yes, I change those batteries twice a year as well. Kidde KN-COPP-3 Nighthawk Plug-In Carbon Monoxide Alarm with Battery Backup6. Outside Winter Snow Equipment
This is a great time to get your snow blower serviced if you didn’t at the end of winter last year. Get the gas and oil ready for that first big snow storm. Make sure your snow shovels are acceptable to use and not chipped so badly that they will ruin the concrete on your driveway or walkway. This last winter Southern Utah had a record snowfall. We don’t have snow plows, snow shovels or snow blowers. I live in a desert. Well, the prepper that I am….we found three of us who had snow shovels to use to help out the neighbors. My husband and a couple of other guys went around and shoveled driveway after driveway. We saw people outside with regular shovels or push brooms trying to clear the snow from their driveway…they don’t work as well. I am thinking the local stores will stock some snow shovels this year. It was a crazy winter everywhere last year. Suncast SN1000 18-Inch Snow Shovel, Navy7. Hot Chocolate
I just have to add hot chocolate. Do you love homemade Hot Chocolate as much as I do? Just picture yourself sipping a warm cup with a little dollop of whipped cream and cinnamon sprinkled on top. LOVE it! You can watch the snowflakes from your comfy chair…….please add cocoa to your food storage. Hershey’s Special Dark Cocoa, 8-Ounce Container (Pack of 2)8. Build Up Your Immune System
We all know we need to eat well and exercise, but it doesn’t hurt to remind us more often. The more fruits and vegetables the better. If we eat healthy food then we will stay healthy, hopefully. We have all heard if you can’t pronounce the words on a box you might want to pass on it. Except, my husband…he loves cereal each morning with milk and bananas. Have you heard the statement that if your grandma couldn’t buy it at the store we shouldn’t eat it? I have heard that….but I grew up on some food I didn’t feed my kids. You have to laugh and take baby steps to start to eat a little healthier. That’s all we can do. Life is good.9. Emergency Food and Water
By now you know how important it is to have extra food, instant milk, and water stored if you get homebound because of the weather. The roads last year were crazy with ice storms, flooding, and heavy snow in various places around the country. Some had hurricanes, tornadoes, and roads shut down. Please add a few more cans or boxes to your shopping cart over the next two months. You will be glad you did, I promise.10. Candles-Flashlights-Emergency Lighting
If possible keep candles with matches ready to use if you lose power. Be sure and have some flashlights and batteries that are fresh and ready to use. If you have some extra pillowcases you can make this to hang from your bed. Emergency Survival Bed Pouch My favorite flashlight is the Goal Zero one. It has a crank, no batteries required, chargeable, and has a solar panel.11. Pet Clothing
This one step is a little sad for me because I lost my last puppy a few years ago. But I still have the sweaters (heavy soft wool) ready if we decide to get another pet. I can’t part with my emergency pet strollers either. Its the prepper in me, I know. Pets need us to prepare for the warmth and care they need, just like children. Stock enough food for three months if possible. If we have to evacuate be ready to keep your pet warm, hydrated and fed.12. Humidifier
In the winter months with the furnace running so much, we need a little more humidity, depending on where you live. I have a portable humidifier / mister going 24/7 through the winter months. I have to use my reverse osmosis water to fill it because our water is so hard here. You may need to use distilled water to help protect your unit. It’s a good idea to have a humidifier if someone is sick with colds, bronchitis or pneumonia. Of course, you must decide if a humidifier is good for your family.13. Family Communication Plan
Sometime before the end of the year (no pressure on anyone) please put together a plan on how you will communicate with each other in a power outage. I am talking friends, neighbors, and family. Please fill out this form by filling in all the names, phone numbers, and emails so they are available when you need to contact those you care about. If your phone with all the contact information you use can’t be charged you will have a paper with the information on it so you can use other communication options. Food Storage Moms-Emergency-Contact-Info. Winter is just around the corner. Don’t get caught unprepared this year. Plan ahead and make sure you are truly READY for the winter months ahead. You’ll be glad you did!Readers Tips:
14. Janet:
If you have a wood burner stove, get the chimney cleaned and checked every year. We just did this today, but usually, we do it in the spring. Not only does it save money, but we live in the country, and are not a priority if the electricity goes out. We have been without electricity for about a week or so. I love the heat, but like the peace of mind having a backup heat source more.
Mykel Hawke "Preparedness: #1 Ranked Survivalist Speaks"