PREPPER: 10 Super Affordable Survival Items You Can Stock up on Now Without Breaking Your Wallet

Canned goods, flashlights, a first aid kit, and drinking water — if
you have these in a survival situation, you’re good, right? Yes,
probably — but add just a few more items to your survival arsenal and
you can go from surviving to actually thriving, even during an
emergency. These 10 items are not only affordable and easy to find, but
incredibly useful in many ways, so you will definitely get your money’s
worth.
Lighter cubes – Fire can be useful in most survival situations,
because they allow you to keep warm, cook food, and boil water for
drinking. However, it’s not always easy to build a fire, but that’s
where lighter cubes come in. According to a list on AskaPrepper.com,
this item is a godsend when you need to start a fire in less-than-ideal
conditions.Emergency blanket – While its main function is to keep you extra warm and toasty, it’s really a multipurpose tool that also works as a makeshift tent. According to SeattleBackpackersMagazine.com, using it as a hammock, a funnel, or to create an air pocket in a forest fire are just some of the 50 ways to make use of this simple but lifesaving item.Whatever situation you find yourself in — whether you’re lost in the wilderness, stuck at home after a natural disaster, or on the move in the aftermath of an EMP, these simple items can help keep you alive.
550 Paracord – Yet another multi-functional item on the list, you can use parachute cords to secure tents, create a pulley system, mark a trail, or hang food above ground to save it from animals.
Folding saw – Keeping a lightweight folding saw on hand is useful for gathering wood for fires or any other purpose.
Batteries – It’s best to make sure you have a good supply of different kinds of batteries so your important electronics stay powered. Batteries could also be a useful commodity to barter with if the situation calls for it.
Duct tape – The limits to what you can do with duct tape are endless. As UrbanSurvivalSite.com shared, this common household item can be used for anything from fixing cracked containers (essential for water), sealing up your area against pathogens, keeping bugs or rocks out of your boots, patching up holes in your tent, making a splint, or making a spear. It’s also cheap and easy to find, so there’s no reason not to stock up on this!
Copper wire – From making snare traps to building simple electronics, copper wire is a great item to have in your survival kit.
Hardtack – This biscuit may not be the most delicious, but they last for up to 100 years. Having a good supply of hardtack as back-up sustenance is a great way to ensure that you’ll always have a food source available, no matter where you find yourself.
Sewing Kit – Fashion is hardly the first order of business in a survival situation, so most preppers don’t really think of keeping a sewing kit around. But this unassuming item has more uses than you think. Beyond mending clothes, your gran’s needle and thread can repair up tents and backpacks and even stitch up open wounds.
Filter Bottle – Clean drinking water is one of the highest priorities in any emergency situation — but there may not always be a source around. Having a water bottle with a built-in filter means that you won’t have to keep boiling or bleaching your water to make sure it’s safe to drink. This item takes out a lot of time and trouble from the process of getting something you’ll be needing constantly.
Survival Fishing Techniques You Need To Know

Moreover, fish is an excellent source of nutrition, and the best part is that they’re super easy to obtain. As we know, fish typically live in large bodies of water such as rivers, ponds, and alpine lakes; however, your best bet should be a stream or river. The most important thing is for you to know how to catch fish and keep them alive, so you don’t use up your energy in vain.
One sure thing is that fish can provide two to three meals each day, but the issue now is how to go about catching them to ensure your survival. Well, the good news is there are a number of methods or techniques for catching fish, but some of them are considered illegal; but let’s face it; you’ve got to do whatever it takes to survive especially when your life is on the line.
Since you’re looking to eat to survive, you’ll have to trump some laws, but I’ll always advise to desist from breaking any fishing laws unless you’re actually dealing with an emergency situation.
First Things First – Bring Essential Fishing Supplies
It’s always an excellent idea to carry fishing supplies as part of your essential survival gear when heading to the backcountry. Since life is typically full of uncertainties, you have to be prepared to face and beat the odds. So be sure to carry a collection of hooks, line, swivels as well as small weights so you can be on the safer side.Well, the very first thing to do when you find yourself in a wilderness emergency is to locate a water source. The good news is, you’re very likely to find a river or stream while searching for a way out the emergency and that’s your cue to catch some fish.
Look:
The surest way to succeed at fishing is by learning about the behavior of fishes. You need to take out time to observe the movements of the fish; more like where it goes at different times of the day. Well, just like other living creatures, fishes love to stay in places that are comfortable for them as well as where they can get easy access to their prey.
It all boils down to the weather condition of the wilderness. So, if you find that the weather is hot and the water is low, then you’re likely to find your catch in deep shaded water. Now, if it’s cold, I recommend looking for a shallow place where the sun warms the water.
It’s also important to note that you’re likely to find smaller fish at higher elevations, but you might not find yourself in these areas at times of an emergency. The good news is that you’re likely to find lots of large fish in streams and rivers located in the lowlands (valley and foothills).
In a nutshell, it’s really important that you know where the fish are, otherwise all the techniques discussed below will of no use to you. The advice above will give you some clue as to where fishes tend to be. However, it takes some practice and experience to be good at spotting fish.
Fortunately, with advance technology these days, you can use a device that will automatically scan the area for fish, known as the fish finder. It operates on ultrasound technology in which it will emit and receive sound waves to detect fish. Also, it will reveal the fish density of the scanned area so you will have a good idea of where most of the fish are.
Use a Fish Net
When it comes to fishing for survival, the most common type of net to use is the gill net. These nets are more effective during the migratory run of fish. Gill nets work by entangling fish as they try to swim through the openings of the net. The good thing is that you’re likely to catch lots of fish if things go as planned.How To Use Gill Nets?
Well, you only have to string it between two anchor points and leave it to hang straight down into the water. You can string the net across a stream, pond or lake and there’s no need to place the top of the net on the surface of the water. If you’re using a gill net in a large body of water, you can anchor the net with sticks in the water in a circular manner; so it’ll be more like a fish trap. The net can also be pulled as a seine along a shoreline to catch a group of fish; the fish will be caught when you close both ends.
Angling
Angling is a very popular fishing method that can ensure your survival. This method requires some items from your survival kit. For the most part, you’ll need a hook, line and a fishing rod. You’ll need to attach the hook to the line which supposed to be connected to a rod; you’ll also need to add a small weight so the hook can go down.It’s also crucial to get a float so the bait can stay at the top of the water and off the bottom (a small piece of bark should suffice). Even if you lost your hook or forgot to bring it along, you can create hooks from materials such as thorns, safety pins, dried bone, etc. Insect and worms are sure to work great as bait; be sure to change to another bait if one fails to get the job done.
Survival Spear Fishing
Another technique of survival fishing technique to consider is spear fishing. Spearfishing is actually one of the oldest methods of fishing that has been around for ages; it’s one of the earliest skills learned by the prehistoric man. The very first thing you should know is that spear fishing requires time, patience and tons of practice to get it right; it’s more like the ultimate blend between a hunter and an angler.It’s better to use a spear in shallow water so you can get a better view of your catch. The next thing is for you to move the spear as close as possible to the fish and quickly spear your catch! A forked spear is sure to work great for your catch, so try to be creative!
Look:
Piercing through the slippery scales or defeating the slender profile of most fish is not a walk in the park, but it’s still an excellent idea to give spear fishing a shot especially when you have no other means of catching fish.
Poison
Are you in a dire emergency? If yes, you can use natural fish poison to stun or kill the fish. What you should know is that the poison can be derived from a variety of natural materials and they can be used in shallow pools or still waters to kill a substantial amount of fish without much effort and time.Here are a couple of things that are sure to come in handy
- For starters, there are some plants which can be crushed and used to release compounds into the water to poison and eventually kill the fish.
- Using young nut husks from walnuts in large quantities can also poison fish.
- Lime can also be used to poison fish in shallow pools. You can make this fish poison by simply burning seashells and crushing the same; this shouldn’t take much of your time as long as you’re in the right location.
Use a Fish Weir
Ever heard about a fish weir? Fish weirs are obstruction which you can create to guide or trap fish to your desired location. A weir could be a circular fence, wall or large funnel that’s primarily designed to lead fish into your trap. The good thing is that the conventional styles of weir construction can still be used in your wilderness emergency situation. For the most part, weirs can be constructed from stone or wood; the stone provides a permanent construction while the use of stakes provides for semi-permanent installations. You can also place nets and baskets at the end of the weirs to trap or contain the fish. Moreover, a weir can make your spear fishing efforts a whole lot easier!Preparing Your Fish
Well, cleaning and cooking your fish might not seem like a fishing technique, but it’s an important phase of the process. I mean, you do not want to end up getting food poisoning after your big catch. The truth is that you can eat all parts of fish, but it’s still a great idea to remove the internal organs. There are two steps to preparing your fish including:Cleaning Your Fish
Alright. The very first thing to do is to gut your fish. Gutting your fish is super easy, in fact, the process is exactly as it sounds! Just get your knife and cut from the anus of the fish and go all the way to the belly, and finally to the bottom jaw. Just be careful not to puncture any of its internal organs while making the incision. You can choose to remove the head or simply use your knife to severe the connection between the internal organs and head of the fish.Once you’re done with that, the next thing is for you to reach in near the head and gut out the internal organs. This should be a piece of cake as the body cavity will be empty in no time. Now that you’ve peeled out the organs, you only have to wash the body cavity out with the water.
Cooking Your Fish
Now that you’ve cleaned your fish, you’re ready to cook it and enjoy a well-earned meal! The good news is that there are a couple of ways to cook your fish even in a survival situation. Here are a few ways to go about cooking your fish and enjoying it to your heart’s content.- For starters, you can get a stick and use the same to impale a whole fish. Once you’ve done that, you can cook it over an open fire. This is the fastest and easiest way to cook your fish but boiling it is also great especially if you’re looking to enjoy its value to the fullest.
- As I mentioned earlier, you can cook your fish by boiling, and the best part is that you’ll get to save the juices for broth (just be sure to boil it with the skin).
- You can also use clay to cook fish; remember, you’re in a survival situation! Just pack fish into a ball of clay and bury the same in the coals of a fire. Be sure leave the fish until the clay hardens. At this point, you only have to break open the clay ball to collect the cooked fish. You can also smoke or fry it especially if you plan to eat the fish later. So how can you prepare the fish for smoking? Simply cut off the head; remove the backbone, and you’re good to go!
Conclusion
And that’s it! With all that being said, we can conclude that fishing is an excellent way to survive in the backcountry. The best part is that catching fish is not difficult once you learned the right techniques to catch and harvest fish. Aside from fish being a sustainable food source, fishing is a pretty good skill to have while dealing with emergency situations – though you will most likely need to improvise, utilizing materials around you to fish.How to Prepare for SHTF on a Budget

It doesn’t require a fortune to prepare for the moment that it all collapses. In fact, it can take a lot less than you’d think as long as you’re smart about what types of things you’re stockpiling and willing to get a little creative when it comes to sourcing. We’ll show you how to get started on making sure you have the stocks you’ll need when it comes down to it, no matter what your budget might look like now.
The Boring Stuff-Making a Solid Budget
You should probably be doing this anyways, but you need to sit down and seriously break down your monthly expenses. There’s usually plenty of fat which can be trimmed away, but it’s up to each individual to decide what they need as compared to what they want.
Once you’ve done tallying this you’ll also need to break down your daily expenses on top of bills and figure out where you can trim and save there.
Depending on how long you’ve been at this, you might have some of what you need already or you might just be starting out. Once you have things laid out in a solid manner, you’ll also want to start making sure that you have some money to put into things each month.
Whether you’ve got your eye on a big capacity hunting backpack or just making sure that you have enough food and water to last at your bug out location you’ll have to make priorities.
Food and water should be top priority, including things like materials for traps and water purification devices. After that it’s up to you and your own plan to decide just how to proceed.
Know Where to Go Cheap

It’s a sad truth that in most arenas you’ll get what you pay for. This can range from mildly irritating to highly problematic and what you end up with is extremely personal.
There’s a few places where it’s never going to be a good idea to cheap out, however.
Don’t go cheap on the following:
Water Purification- This is a top priority and you want to make sure that you have multiple ways to do things. It’s especially important if you end up having to flee your location. Purchase something high-quality, and preferably with multiple methods of doing so.
Ammunition- A lot of people make the mistake of going cheap here. A lot more people can tell you horror stories about their AR jamming with cheap, aluminum rounds. Your weapons are your lifeline, a jam on the shooting rest is one thing but when your life is on the line it’s a truly terrifying prospect. This doesn’t mean you’ll want to buy gimmicky, expensive ammunition either, but surplus rounds with a price too good to be true are generally a bad idea.
Your Bug Out Bag-Hopefully you’ll never have to use it, but as traveler’s, hunters, and outdoorsmen of all types will tell you: having a bag break while you’re on the move sucks. It’ll also be a serious impediment to your survival and isn’t likely to be something you can quickly and easily replace while on the move.
Instead, you should look for cost cutting measures on more generic items. Spending excessive amounts of money on fancy cording or name-brand medical supplies is generally a waste for the amount of value you get.
Knives are particularly guilty of this. While that high-end ESEE might be a bit better, is it really worth twice the price of a USMC Ka-Bar? Cheap Kershaw folding knives might not hold up as well as a high-end Benchmade, but is the five-fold or more difference in cost worth it?
It’s all about value for the dollar. When you get past the initial cheap trash in many areas you’re looking at a decreasing return per dollar spent. What your budget is and how well you do your research will determine where your cut-off point is.
Food is another area where people tend to spend too much cash. Generic survival rations will keep just as well as name brands. As prepping has become a more common activity the usual suspects get involved, and it’s worth taking a second look at products specifically sold to preppers to make sure there’s actual value added beyond the marketing.
Learn to Love DIY
A lot of things can be made fairly simply at home, and in fact once your initial supplies begin to dwindle in a long-term situation you’ll end up doing it yourself.
Regardless of the amount of space you have, for instance, you can definitely can and bottle goods much more cheaply than you can buy them. You’ll also have valuable experience with preservation if the worst happens, as well as experience with growing your own crops. Kind of hard to beat being both cost-effective and learning a new skill in one blow.
Doing your own repairs around the house, especially while you still have internet access, is another example of something that will both cut costs and provide you with valuable skills that you may need in the future. There’s no better teacher than experience after all.
Knowing how to handle the basics of just about everything isn’t going to be beyond most people. Skills like flint knapping and bushcraft can be overlooked by preppers, but they come in handy on occasion even for casual hunters and outdoorsmen.
The more you do yourself, the better off you’ll be.
Wise Shopping
There are a lot of items which can be used for your stores which can be purchased at a fraction of the cost without spending the money on name brands. Things like rubbing alcohol and bandages, for instance, can often be purchased at dollar stores at a good price without breaking the bank.
Buying food items in bulk can also be a huge help. For nonperishables, you can even start to fit your normal eating and prepping budgets together, plus you’ll have experience using these kinds of foods to make something that’ll taste good as well as keep you alive.
This step largely boils down that that most exciting of hobbies: consumer research. This means that you’ll have to keep on top of things and keep an eye out for deals. Quit throwing away those coupons that come in the mail and give them a careful look over, you can find some pretty impressive deals.
This might also mean occasionally spending some extra money, if a good pair of boots is on sale, for instance, you might be better off buying a couple pairs. Rotate them to break them in and then stash the extra pair, this way you’ll know that you have something vital with extras.
Conclusion
As you can see, it doesn’t take a rich man to be prepared for a SHTF situation. If you’re on a limited budget, however, it may require a bit of research and a bit of sacrifice in order to make sure that you and your family are safe in the event the worst comes however. By making sure you’re on top of things now, however, you can also make sure that you avoid a whole lot of trouble in the future and that’s the important part.
Author Bio:
Kevin Steffey is an avid hunter and freelance writer. He loves spending time in the field with his rifle more than almost anything else, and occupies his off-time discussing deer and their habits online. He is a founder at www.deerhuntingfield.com
7 Things You Need To Hunker Down

Bugging out in case of emergency is a much-discussed option in prepping. And it’s a real necessity, for some disasters. But what happens if you decide to hunker down? Let’s say there’s no need to evacuate your home. And going out and about might be dangerous. You’re in, for the duration. Here are the 7 main things you need to hole up and wait out the situation.
1. Shelter
You have a home. Good. But preppers need to consider whether their current home is arranged in a suitable manner for waiting out a disaster. I would suggest walking around the property and looking for security vulnerabilities. Windows tend to be an easy point of ingress. Maybe a set of storm windows will help deter intruders. Sliding glass doors are particularly vulnerable. Here’s an article with tips on securing a sliding glass door.
Does your property have obstacles that provide cover or concealment for assailants? You might want to rearrange things so that you have a clear line of sight around your home, as much as is practical. If you have a garage, make sure it’s not easy to break into, and try to locate your prepping supplies in the most secure place in your home.
2. Food
Preppers are well-known for storing plenty of food. It’s one of the top concerns of most preppers. But I find myself getting lax about my food supplies, forgetting to check expiration dates and using up some supplies without replacing them. It’s good to do an inventory of stored food from time to time. Then add some new stored food to your supplies, especially vegetable oil and protein sources.
Rotating stored food is essential to keeping your supplies refreshed and ready to use. But it’s a little tedious to track, so keep an eye on foods you don’t use too often. For myself, I have plenty of white rice and pasta, which basically never goes bad. But many protein sources, such as nuts/seeds do need to be rotated and kept fresh.
Anything stored in the freezer will actually keep indefinitely, as long as it’s frozen. But I go over my freezer food from time to time to see that I’m making the best use of that limited space. I prioritize perishables: egg whites, cheese, butter, and meat/poultry in the freezer.
3. Water
Tap water is taken for granted, even by many preppers. But it’s hard to store water. It’s heavy and you need quite a lot of it. So probably the best option for drinking water is water purification equipment. There are several good companies that make this type of product. I prefer the LifeStraw products from Vestergaard. I have the LifeStraw Family 1.0 model, which is very compact (and still available for sale). The 2.0 version has some improvements, though it is larger and more expensive. If you want to go whole-hog, and don’t mind spending some bucks, LifeStraw Community is the ultimate in water purification. (I get no money or benefits from recommending these products. I just think they are the best available.)
Many water purification products do not filter out viruses. Read the fine print. You want a product that filters out bacteria, protozoa (parasites), and viruses. The EPA standard for removal of pathogens is:
(1) bacteria, 6 logs (i.e. 99.9999%) or better
(2) viruses, 4 logs (99.99%) or better
(3) parasites (protozoa), 3 logs (99.9%) or better
LifeStraw Family (1.0 and 2.0) and LifeStraw Community meet or exceed those standards. But “LifeStraw Personal” and “LifeStraw Go” do NOT remove viruses. In fact, most small portable water purification devices do not remove viruses. So for prepping purposes, you need the larger device. I think LifeStraw Family 1.0 is the cheapest best device that meets the standard for removal of all three: bacteria, parasites, and viruses.
4. Meds
Both over-the-counter and prescription medications are likely to be in short supply, once the Stuffing hits the Fan. I’ve bought a bunch of OTC meds from Amazon, in large quantity, for prepping purposes. Remember to keep all meds, even OTC ones, in a locked cabinet, away from children and teens and other persons with questionable judgment.
Prescription meds, for anything you have to take on a continuing basis, can often be obtained in a 90-day supply. Ask your doctor.
When the SHTF, it might be dangerous to take that trip to the pharmacy or drug store. And even if it is not, the shelves might be stripped bare.
5. Guns
If you are an avid shooter, you probably already own the guns you need in order to exercise “the right of law-abiding, responsible citizens to use arms in defense of hearth and home” [SCOTUS], and you know how to use them. Good on you.
But some preppers are not too interested in guns and some maybe even don’t particularly like guns. To those preppers, I say, guns are useful tools, especially when the SHTF. In such times, the ability of the police to keep law and order is diminished by a sudden surge in crime. Get one, even if you don’t like it.
What sort of gun should you own, if you want an easy-to-learn firearm, for home defense, without spending much time at the range? I’m going to make just a few brief suggestions.
A lever action rifle in .22LR is the minimum I would recommend for home defense. It is very low recoil and relatively low noise. You must work the lever before you take each shot. It’s easy to learn, reliable, and accurate. For more power, get a lever action rifle that shoots .38 Special. That’s a good caliber of ammunition for beginners. In any case, make sure you and your family have hearing protection.
A Ruger 10/22 rifle is lightweight, inexpensive, and has sufficient accuracy and power for home defense. It’s also low recoil and can take magazines (where permitted by law) of 25 rounds. The 10/22 rifle is semi-automatic, which means it keeps shooting as long as you keep pulling the trigger. You don’t have to work a lever or bolt between shots.
The Hi-Point carbine in 9mm is also a good choice for someone new to firearms, looking for a home defense gun. It’s reliable and low priced. It shoots with greater accuracy than a new shooter could get from a pistol, but it fires the popular widely-available pistol ammunition (9mm Parabellum, also called 9mm Luger or 9×19 NATO). Recoil and noise are modest, but hearing protection is always recommended for all guns.
Now if you must have a handgun, rather than a long gun for home defense, and you are a new shooter, I would say you should go with a revolver. Get a .357 magnum revolver with maybe a 4-inch barrel, but load it only with .38 Special ammo (much less recoil and noise). Many revolvers can shoot both types of ammo. And even if you only ever use the much less powerful .38 Special, you retain the option to switch to the higher powered magnum ammo later.
6. Entertainment
I think entertainment is often overlooked by preppers when building their SHTF supplies for home or car or bug-out bag. In any disaster scenario, you don’t want to merely survive, you want to thrive. And that means having some refreshment for the mind and heart. Hence, these last two “needs” for hunkering down: entertainment and family/friends.
I would begin by making the assumption that the internet might be down for extended periods of time. Cable TV also. So that means you might have to resort to that old fashioned form of entertainment, talking to one another. Just kidding. Keep a DVD or Bluray player handy, with a bunch of popular movies and TV shows on disc.
If all else fails, you could play cards. Or charades. I also suggest keeping on hand actual physical books for your reading pleasure and for reference. We have become too dependent on computers and the internet (he said, as he typed up his latest blog post).
7. Family and Friends
Last, but not least, people need people. Preppers need family and friends to help us get through difficult times. It’s good for the soul to have people with you who care for you, and for whom you care. It’s also practical in a crisis. All hands on deck, and that sort of thing.
9 Ways to Store Meat Without Refrigeration
In today’s world, it has become extremely important to prepare your family for disasters. Even something small like an ice storm could knock out power and close roadways for days at a time. To prepare for events like this, many people are beginning to realize the importance of having local food sources and keeping stored food on hand. Unfortunately, even if you raise your own animals, preserving meat the modern way involves a large, reliable source of electricity.1. Smoking
Smoking is one of the oldest methods of preserving meat. It was most commonly used in areas that had too much humidity to air dry or dehydrate meat (without the aid of a modern dehydrator of course). It can be really tasty. However, modern recommendations are to consume smoked meat sparingly as smoke contains carcinogens. That being said, it may still be a good choice for some of your harvest or an emergency situation. Smokers can be purchased or made at home. Obviously, this method is better suited to those with access to a backyard.2. Curing (salting)
Curing meat is another old preservation method that is still used today. It involves quite a bit of time and effort but it’s how traditional favorites like bacon and pastrami were preserved. It’s also a cheap and easy process to master perfect for the new homesteader. You will need a cool area and a place where meats can be hung out of the way. Some curing recipes are used in combination with smoking for flavor.3. Brining
It’s a very simple and is a traditional method of preservation. Brine is typically a simple mixture of water, sugar, and salt. The meat is preserved by being weighed down in a crock completely surrounded by brine. As with curing, you’ll need a cool area, and if you’re doing any large quantities be sure you have room to store your crocks.4. Pressure Canning
First, it’s important to note that you absolutely cannot water bath can meat! It’s not acidic enough. However, if you have a pressure canner any type of meat can be easily pressure canned. This is probably one of the most popular methods today as once the meat is canned it requires no further work. You just re-heat it when you’re ready to eat and the jars are portable. Pressure canners are affordable, perfect for even apartment homesteaders, and are great for putting up vegetable harvests too.5. Dehydrating
This is probably one of the easiest, healthiest methods of storing meat (and vegetables too). Meat can be dried with the help of an electric dehydrator or a solar dehydrator. If you opt for an electric dehydrator, it’s probably best to purchase a larger one. Even though they’re cheaper, constantly running a small one trying to preserve all your food will take a lot of electricity. Solar dehydrators obviously have the benefit of not requiring electricity, but they are weather dependent. Solar dehydrators can be purchased or there’s a lot of DIY plans available online. With either you’ll need to make sure you’re meat is fully dried. If it’s left too moist it can mold.6. Storing in Lard
This method may be very practical for those butchering an animal with a lot of fat. Both raw and cooked meat can be layered in a crock with melted lard. The lard prevents the growth of bacteria by keeping air from getting to the meat. It’s a cheap and effective storage method and involves no equipment.7. Freeze Drying
This method is probably the least practical for a small homestead because you’ll need to purchase a freeze dryer. That being said they do make home models and freeze dried food comes with a lot of benefits. It’s lightweight, anything can be freeze dried including leftovers, and freeze dried food retains almost all of its nutrition. As it’s so light, freeze dried food is perfect for backpacking or emergency travels.8. Keep Heritage Livestock
For those who keep livestock, obviously you may want to consider heritage breeds. Unlike modern livestock, heritage breeds are typically smaller. This was because a family would be able to use most or all of the animal before it went bad without having to preserve it. With the advent of refrigeration and factory farms, livestock was bred to be bigger and bigger which is not necessarily helpful for the small homestead. Some heritage livestock was also bred to have a higher fat content than their modern counterparts, which can be helpful in preservation.9. Natural Refrigeration/Freezing
Though this is not the most reliable method, it is worth mentioning. In colder climates, it’s possible to store meat outside in the winter, but you’ll need to keep an eye on the thermometer if the weather warms up. You’ll also need to keep it in a secure building or container. Leaving meat out, frozen or not, can attract predators. Some people also have used hand dug wells as refrigerators. Simply put the meat in water tight jars and sink them in the well for short term refrigeration. Again, you’ll need to watch the temperature carefully.Producing a lot of food is often one of a homesteader’s first goals, but if you rely on electricity to keep your harvest, you risk losing it all to a power outage. Knowing how to keep your food good when the power goes out using a combination of modern and traditional techniques can save you money and keep your family healthy.
No matter what method you choose, the most important part is safety. For our ancestors who preserved food on a near daily basis during the harvest season, it was no big deal. But until you’re confident, it’s important for the modern homesteader to find and follow credible recipes and preservation methods.
10 Great Depression Era Strategies For Saving Money
The Great Depression was an extremely difficult period around the world as a result of the depression that began in America. Unemployment reached to 25 percent in the United States, and most people’s bank savings were wiped out. People started migrating to other areas in search of jobs, and farmers began migrating in the false hope that the situation in neighboring areas would be better.People who survived the Great Depression embedded habits into their lives that they found hard to change, such as refusing to part with anything that might come in handy at any future point in their life. To them, cutting off and discarding the ends of a loaf of bread is not a good idea and scraping the wrapper of a block of cheese certainly is. During this difficult time, people also learned smart budgeting by doing more with less.
Related: 50 Tips From the Great Depression
The Great Depression lasted for more than a decade, and people of that generation developed budgeting strategies that are effective even today. From a financial viewpoint, there’s definitely a lot we can learn from our elders, who survived a difficult past. Here are a few tips that our grandparents and great-grandparents used to survive the Great Depression.
#1. Reuse, Reduce, Recycle and Repair

Our grandparents were experts in re-purposing things that had already been used. Recycling plastic bags by using them as trash bags and making use of old t-shirts and socks as rags are some amazing hacks we can learn from our elders. This is an excellent strategy for saving money. Instead of spending money buying new things, recycle and reuse is a technique that proves to be very beneficial for saving money.
#2. Pay With Cash More Often
During the Great Depression, people didn’t have enough savings in their bank accounts, and hence they used cash for any transactions. This strategy can save us from unwanted debts. Here’s why you absolutely must have food supplies, hard assets and reserve cash.
#3. Try to Be Self-Sufficient
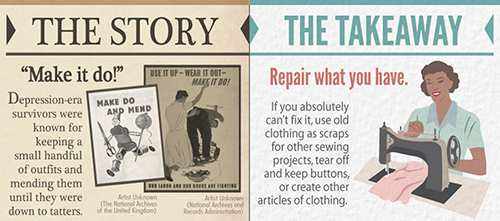
Americans adopted this strategy during the Great Depression by doing all their tasks for themselves. Sewing their own clothes, growing food on their own farms, and cooking from scratch are some strategies they adopted to save money. They mastered these skills to save money. We have to learn these skills from them.
#4. Budgeting Using a Diary or Envelopes
Our grandparents and great-grandparents did not have electronic gadgets to keep track of their budgets, so they used diaries and envelopes for budgeting their expenses. You can still use the traditional method of maintaining a diary by starting by planning how much you want to spend each month for each category, namely, housing, transportation, food, etc. You can keep several envelopes, each dedicated to a different category, and start by putting in the amount you allocate for each category. Use the money from each envelope for that purpose only. Here are 21 lost tips from 100 years ago – with illustrations.
#5. Buy Used Instead of New
If you are really serious about saving money, you will have to do so in every area. You can save a lot of money by buying used instead of new, including automobiles, toys, clothing, and so on. The barter system, which was a common practice during the Depression Era, is an excellent way to save money. You could even trade some of your skills in exchange for some fresh produce from a neighbor’s garden.
#6. Weigh Your Wants and Needs
It is essential to get meet your needs, but it is not necessary to satisfy all your wants. Americans learned to differentiate between their wants and needs during the Great Depression. If they did not have something they wanted, they learned to live without it. Similarly, you can follow suit here. If you already have something that meets your basic needs but you are looking to buy something better or a newer version, continue to use what you have instead of buying something new. For instance, wear clothes you already have instead of buying new ones, and use that two-year-old cell phone if it works well instead of getting yourself the latest model. This strategy is one of the most effective strategies that is also shared by many financial and budgeting experts. As Warren Buffet says, “If you buy things you don’t need, you will soon sell things you need.” This strategy holds true in the case of saving as well. Additionally, check these 11 survival tricks learned from homeless people.
#7. Try Your Hand at Freelancing

Even if you have a full-time job, earning some extra bucks is always a great idea. Many people back in the 1920s and 1930s did freelance work, such as selling photographs and home-cooked food. If you have a special skill or hobby, showcase that and earn some money as a passive income to keep the flow going. Today, there are many websites catering exclusively to freelancers, giving them the opportunity to sell their work online.
#8. Plant Those Seeds for a Lush Garden
Every time you bring vegetables or fruits home, do not forget to remove the seeds from some of them, dry them out, and then replant them in your own garden. This helps to keep your garden going all through the summer, and you won’t have to spend money buying veggies or fruits elsewhere. Americans used this method of growing seeds in their own farms back in the Depression Era.
#9. Let All the Members of Your Family Contribute
That’s exactly what Americans during the Great Depression Era did. Of course, if you have small children, they won’t be able to contribute financially, but they can help out in other ways. You and your spouse should both do your bit when it comes to taking up the financial burden of the whole family. Additionally, here’s how to get your wife and kids involved in prepping.
#10. Scrape to the Last Drop
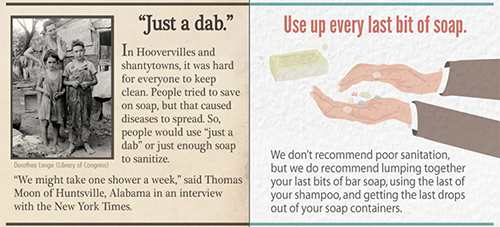
Yes, you read that right. Back in the 1930s, people never let go of even a single drop of their ketchup, toothpaste, shampoo, etc. They made sure that they scraped the bottles to the last bit. You definitely can save a lot by using everyday items to the last drop. As the saying goes, “Drop by drop forms a river.”
Surviving the Great Depression was a struggle, in fact, a nightmare for millions of people. But the tips and strategies people of that generation have left behind are invaluable. They lived their lives using whatever means of survival they had, and their strategies for saving money are applicable even today. Today’s economic policies are based on the wisdom gained during the Great Depression. Will another Great Depression occur today? Probably not. But we can still follow our grandparents’ lead when it comes to saving money.
4 Top Survival Skills You Must Teach Your Kids

Some of Bear Grylls’ biggest fans are kids. Their eyes widen at his derring-do, and boys and girls alike admire his survival skills and savvy. However, the survival skills for kids that will keep them safe and sound are far more mundane! Below are four survival skills for kids to learn, along with a few tips for parents.
1. What To Do If They Get Lost
A lost child is a scared child, and usually their first instinct is to begin searching for their family. I remember being separated as a child from my parents at a department store. The feeling was so terrifying. My heart and thoughts were racing, though my thoughts were not organized. Looking around, frantically scanning faces and trying not to cry was all I could do. I was found and that experience helps me now as an adult. I know what children feel like when they are lost. Whether your child is lost in a grocery store or on a hiking trip, the instruction is the same. Train your child to stop and sit as soon as he or she realizes they are lost. Assure them that no matter how scared they might be, you are searching for them at that very moment. Explain to them that you will be looking for them, but if they keep moving around, it will take longer to find them.Consider equipping your child with an inexpensive cell phone and when venturing outdoors, a few survival items tucked in a fanny pack or their pockets. Items such as a whistle, a bright bandana and a bottle of water will go a long way to helping a lost child be found more quickly. This survival skill could save your child’s live.
2. How To Answer The Door When They Are Home Alone
Usually the best strategy is to not answer the door! Yes, the person knocking could be a burglar scoping out the neighborhood, but once the door is opened, it’s just that much easier for an intruder to enter, and children are easily overpowered. You could install a peep hole at a lower level for them. Unless it is someone they know well, like grandma, they should not answer the door. Strict rules were made at our home concerning this. Friends were not allowed over while we were gone, except under certain circumstances. When the door is opened and closed with kids in and out, it leave those in the home vulnerable to someone who is watching the home.Train your child to keep doors and windows locked and blinds and curtains closed. Noise from a TV or radio is fine. Someone with questionable motives will think twice about entering a home if they hear noises inside, even if the house is closed up and no one answers the door. Children should know their address in case they need to call 911.
TIP: Are your kids quipped to handle these scary scenarios?
3. What To Do In A Medical Emergency
From a young age, kids can learn how to dial 911 and report an emergency, but this takes practice. Spend some time rehearsing phone calls, teaching your children to relay detailed information to an operator, follow his or her instructions, and then stay on the line until help arrives.
TIP: Read about 3 medical concepts you should teach your children.
If possible, they should also get the home ready for the arrival of
EMTs by putting pets in closed areas and, if it’s nighttime, turning on
both indoor and outdoor lights. Practice with them what you would like
them to do in an emergency. Then do a dry run, with a variety of
scenarios. Go over your dry run every summer, winter and spring break
your kids have. They will develop more confidence in their skills the
more they practice.
TIP: Educate yourself about the variety of preparedness drills you can do with your children. Check it out here.
Summer is an ideal time for children to take first aid and CPR classes, and these are suitable for kids ages 9 and up. The Red Cross and community centers offer these type of classes. You can look for Red Cross classes in your area at http://www.redcross.org/ux/take-a-class4. Situational Awareness
This one skill can help your child avoid many dangerous situations. It’s simply being aware of the people and events around you. Parents can help their children become more observant and aware, not by scaring them, but by playing games to teach and practice this skill. Remember to adjust the questions to the maturity and age of the child. Some questions (games) you can play are:- When driving in the car, ask your kids to describe a building or vehicle you just passed.
- Teach them to pay attention to the route home by asking them to give you driving directions.
- Tell them to close their eyes and describe what someone in the room is wearing.
- Encourage them to check out the license plates of passing cars: Which states are they from? What is the sum of the numbers on the license plate?
- How many exits are there in the restaurant?
- What if? games as detailed here.
Our children have always been told that if they ever have that “gut feeling” that something is wrong, to believe it. As parents, we would believe them and take their side. Often, predators are people that the family knows, relatives, coaches, teachers, and neighbors. They can groom children for abuse and the children find themselves in a situation where they feel that something is wrong, but don’t want to disappoint the person.
Again, I reminded my children that they can leave the situation. Even if it is against the rules, there will be no consequences. Our children needed to know that they can trust that feeling inside of them, and we will trust it, too.
As you go about your errands and vacations this summer, ask your children questions and help them learn about situation awareness. These 4 survival skills are simple to teach, fun to practice, and quite possibly, life savers.
