PREPPER: Top Bartering Items Every Prepper Should Have
The latest from the prepping/survivalist world

Any conversation about prepping first starts with the “the best survival gun” followed by “bugging out vs hunkering down” and then on to “the best retreat location” and then to “what to have on hand for barter… well today, I’m going to answer that question.
The first thing to consider is what items do people need and use every day, followed by will they need these items after a long-term disaster and if so will those items be readily available when the resupply lines are cut. If not, then would those items be easy to make from other common items?
These are the questions I asked when putting away my own barter items – those are included in the list below in no order.
1. Ammunition
While I don’t advocate bartering most ammo after a collapse simply because that ammo could be used against you. Stop and think about it, if a person needs to barter for ammo in the first weeks and months after a collapse then it’s evident that that person has not prepped and will need other stuff, stuff they figure that you now have and there is no guarantee that they won’t use the ammo that you traded them at a later date to kill you and take your preps for their own use.
The exception that I make with ammo for barter purposes is for shotgun ammo. I’ve stocked up a large amount (500 rounds) of 12 gauge bird shot in #6 and smaller shot sizes for barter purposes. Sure birdshot can kill someone, however, it’s low penetration and short range make it one of the least threatening ammo types that can be stocked up and used for barter purposes.
2. Water Filters
Fresh, clean drinking water will always be in demand and while storing water for barter might not be feasible for most people it’s easy and takes up little room to store water filters such as the life straw. The life straw is an excellent barter item, that is easy to store, has a long shelf-life and is small and lightweight meaning that 25 or more of these types of water filters can be stored in a small space life a military ammo can.
3. Garden Seed
Seed to grow food is one of the if the best barter items that you can have on hand post collapse. I store both non-hybrid seed as well as hybrid vegetable seed for barter. Seed is light-weight and inexpensive but will be worth more than gold to a survivor who is trying to barter for those seed after the balloon goes up. But, before, you go out and buy a bunch of seed for barter (or for your own use) do some research on what grows well in your local area. Another thing that I’ve done is print off copies of the PDF guide “Planting a Home Vegetable Garden” to handout when bartering with vegetable seed because most people have no idea how to plant a garden and this pamphlet will give them more confidence in their own ability to take the seed and grow food. This will help them to be successful as well as increase the perceived value of the seeds when you’re negotiating your barter deal.
4. Solar Panels and Rechargeable Batteries
Wow! Wipe that look off your face, I know what you’re thinking… solar panels… those are expensive and I can’t afford those for myself let alone stockpile enough for barter. Well, in some cases you would be correct, however, I’m not talking about expensive 200-watt panels, no not for barter, what I’m talking about here is smaller solar chargers such as the C.Crane 11-in-1 Solar Battery Charger priced at $24.99 each or the SunJack Portable Solar Charger with a SunJack USB Battery Charger for Rechargeable AA/AAA Ni-Mh and Ni-Cd Batteries for under $60 dollars. You can also set up a charging center where people can bring you their batteries to charge and you use your solar set up to charge their batteries in exchange for goods.
5. First Aid Supplies
You could stock up on individual first-aid items such as bandages and gauze and while that’s a good idea, I’ve also stocked up on premade first-aid kits for barter. These kits can be bought for under $20 each now but post-collapse would be worth much, much more. Don’t forget about antibiotics – you can get antibiotics here and find out more about their use here. If you have medical skills (or someone in your group does) then those medical skills will be in high demand and can be bartered for just about anything that you need.
6. Skills
As mentioned above in item number five medical skills are and will continue to be in high demand after any major disaster especially a long-term disaster, however other skills will be in demand too. Skills such as carpentry, auto and shop mechanics, sewing, firearms repair etc will be in high demand and those skills can be bartered for goods that you need. Don’t forget to put back the tools you’ll need to get the job done in the best, quickest and safest way possible.
7. Toilet Paper, Baby Diapers, and Tampons
Toilet paper, baby diapers, and tampons are always in demand will continue to be in the aftermath of both short-term and long-term disaster. Sure some folks might substitute toilet paper with something else like a cloth or even leaves if forced but toilet paper would be a luxury and preferred by nearly everyone and survivors would pay handsomely for that luxury post collapse. Same with tampons and pads. Baby diapers would also be needed and in demand – if you have a baby, plan to or someone in your prepper group has one then I suggest that you look into cloth diapers
8. Coffee, Tobacco, and Booze
Oh, my… need I say more. Most people have their vices and most of those vices involve one or all of the three. Bags of tobacco that have been vacuum sealed with give the longest shelf life. If you can brew your own booze then you and your product would be in high demand, but by so doing you would probably increase your chances of being robbed for your product so security and caution would be a top priority. Currently, there are laws regarding the brewing of booze, find out the laws in your state if this is something that you’re interested in learning and follow those now, but after a major collapse, they probably won’t be a whole lot of enforcement of those laws that are currently on the books.
9. Lighters and Matches
Lighters and matches for barter should be self-explanatory, but keep in mind that these like condoms and some of the other items mentioned above would most valuable for barter after a major long-term EOTWAWKI type of event. Because we don’t know exactly what is going to happen or when it’s best to stockpile smaller amounts of many different barter items than a massive amount of only one or two items. Before anyone sends an email telling me that matches have a short self-life, it should be noted that I have matches from over 15 years ago in a glass jar that still strike and burn just as well as the day I put them into storage. The key is to keep them dry and add a desiccant.
What barter Items have you stockpiled? Please share your thoughts and comments below.
The Prepper’s Food Storage Checklist
Easy to Follow Food Storage List
 When
it comes to storing enough food to survive, unassisted and on your own
for three six-months or a full year or even longer is the point where
most new preppers
get overwhelmed and some even give up altogether. And while I agree
that storing and rotating such a large amount of food on a continuing
basis can be a lot of work and takes dedication, it is by no means
impossible, and if done right can even be enjoyable – just follow this food storage list.
When
it comes to storing enough food to survive, unassisted and on your own
for three six-months or a full year or even longer is the point where
most new preppers
get overwhelmed and some even give up altogether. And while I agree
that storing and rotating such a large amount of food on a continuing
basis can be a lot of work and takes dedication, it is by no means
impossible, and if done right can even be enjoyable – just follow this food storage list.But where do you start? You should start with the basics first wheat (or other grains, for those who have trouble digesting gluten), rice, beans, oats, corn, salt, honey, cooking oil and powdered milk.
Wheat
This is the backbone of your survival diet. Wheat is nature’s longest storing seed, with an indefinite shelf life given proper storage conditions. The wheat (and other grains) can also be sprouted, adding fresh greens to the diet even in winter.Rice
Rice is my favorite storage foods and I actually prefer rice over wheat for storage, but that’s a personal decision, and well I like rice and rice dishes. White rice stores better and has a longer shelf-life than brown rice; however brown rice has more nutritional value. Despite the trade-off in storage duration, I still prefer brown rice for storage because of the added nutritional value.Beans
Beans, corn and rice combined make a complete food, providing just about everything you need to survive. Add some fresh green sprouts or garden produce and extra vitamin C just to be sure you’re getting enough to avoid scurvy, and you’ll be well fed and healthy.I like to store a combination of pinto beans, black beans, and mung beans. How much you store of each will depend on your personal preferences to taste.
Oats
Don’t go overboard when storing oats, about 20 pounds per adult per year is plenty. Oats have a storage life of approximately four to six years, depending on storage conditions and whether or not they have been opened after being packaged for long term storage.Corn
Corn equals cornmeal, cornbread, cornmeal mush, corn cakes, and a huge list of other foods that you can prepare using the seed. I store whole corn because it stores much better and with at least double the shelf-like of cracked corn.Salt
While not a food but a mineral, salt, is none the less essential to the diet and individual health. Salt is also used in the preservation of food and animal products. Salt, like wheat, has an indefinite shelf life. Store at least 10 pounds of iodized salt per person, per year.It’s also a good idea to stock up on salt blocks to attract game animals for future harvesting. You can find these in the sporting goods stores and other outlets that sell to hunters. You can also get these through your local farmers co-op, where they sell them for domestic livestock supplementation.
Honey or Sugar
As a sweetener honey makes an unequaled contribution to the diet. Honey, like wheat and salt, has an indefinite self-life. Store at least 10 pounds per person. If the honey hardens and crystallizes, heat it slowly in a double boiler to reconstitute.Cooking Oil
There is some controversy as to which is best for storage in the preppers pantry, vegetable oil or olive oil, while both will work fine and you should stock up on the one that you like best. I recommend putting away, 10 quarts, per person, per year.Powdered Milk
Most people turn their nose at the thought of powdered milk, preferring whole milk from the supermarket shelf. Granted it does have a slightly different taste, but it’s not unpleasant to drink, and after a week or two it seems to “grow” on you. Studies have shown that nonfat powdered milk, when packaged (nitrogen-packed) and stored properly has a storage life of 20 years or more.Stockpiling Hard To Store Foods
I prefer to buy those hard-to-store long-term items like powdered milk, dry margarine, butter powder, buttermilk powder, cheese powder, shortening, and powdered eggs prepackaged for long-term storage in #10 metal cans, from Augason Farms or other reputable survival food vendors.Supermarket Canned Foods
 Canned
foods from the supermarket have many advantages when it comes to food
storage, they have a decent shelf-life on average of 2-5 years for most
products, (note: shelf-life means that the foods retain 100% of their
listed original nutritional value up until that point – store bought
canned foods remain edible, far past the listed expiration dates in most
cases).
Canned
foods from the supermarket have many advantages when it comes to food
storage, they have a decent shelf-life on average of 2-5 years for most
products, (note: shelf-life means that the foods retain 100% of their
listed original nutritional value up until that point – store bought
canned foods remain edible, far past the listed expiration dates in most
cases).As long as the cans aren’t bulging, rusted through or punctured and the foods smell fresh, upon opening then I would not hesitate to eat canned goods that are far past their listed expiration date. But that is a personal choice and one you’ll have to make yourself when the decision is needed.
Store bought canned foods have several advantages over freeze-dried or dehydrated foods, including cost and calories contained per serving. Another advantage is that canned foods already have their own water supply for preparation, so there is no need to use any potable water from your storage.
Despite the advantages of canned foods over freeze-dried and dehydrated foods, canned goods do have some disadvantages in comparison, like, weight, space needed for storage, and shelf-life.
I like to include a combination of the basic foods like wheat, rice, and beans, store bought canned foods and certain “packaged for long-term storage” foods that are hard to store like powdered milk from one of the reputable survival food vendors…
All canned foods should be dated using a permanent marker and rotated on a FIFO (first-in-first-out) basis. I suggest that you build a rotating canned food shelf that will automatically rotate your canned foods when added and pulled from the shelf.
Always keep a notepad beside the shelf or in your kitchen, and write down every item that you take from the shelf and then take the note with you on your next trip to the supermarket, and then buy and restock the items that you’ve taken from the shelf, that way you always have a fully stocked shelf and a fresh supply.
Don’t Forget the Can Opener:
Sure you could use a knife, but a manual can opener is easier and safer – so whatever else you do, don’t forget the can opener. Buy several or the strongest made ones that you can find.
Other Foods
After you get the basic foods listed above in the needed proportions (see below), it is a simple matter to add other foods as you get the extra money.Canned meats: We all know that SPAM is the preppers go to for a cheap “meat” source that has a longer than average shelf-life, and fat content. Canned hams, tuna, salmon, chicken, and turkey are all welcome additions in my pantry shelf – stock-up on the meats that your family normally eat and date and rotate just as you would any other canned food.
White flour: White flour from the store has a much longer shelf-life than does whole wheat flour because it has been “processed” which removes the oily germ, but unfortunately this “processing also removes the nutrition.
Processed white flour has a shelf-life of over five years if kept dry and safe from pests (like the meal moth). Mill moths get into the flour, lay eggs and those eggs turn into flour weevils, which ruin the flour. Look for tiny dark specks in the flour, as this is the first sign that the flour has been infested.
If it clumps together because of settling, just break it apart and run it through a sifter before use.
Store flour for long-term storage in airtight containers, with oxygen absorbers, added – see details below. You can also freeze flour that has been put into five-gallon buckets. Freezing will also kill any meal moths that happen to have been trapped inside before they can do any damage to your flour.
Most of my “flour” is in the form of whole wheat berries, that I have to mill (grind) before use, but I do have some processed flour in my pantry, for lazy days when I don’t feel like grinding whole wheat into usable flour.
Peanut butter: Peanut butter is a good source of fat and calories and has a decent shelf-life. Peanut butter is also an energy food and one that I always take on hunting and camping trips. Unopened peanut butter will last for years.
Spices: Be sure to include a good selection on spices in your food storage. Spices can make even the most awkward foods palatable, and help to alleviate food boredom. Cinnamon, Turmeric, Paprika, Ginger, Oregano, and Garlic are my favorites and make up the bulk of the spices in my pantry.
Baking powder, baking soda, and yeast: Baking powder, baking soda, and yeast (keep yeast frozen to extend shelf-life) are also essential since you’re storing and baking using unprocessed grains.
Dried pasta: Dried pasta will keep indefinitely if kept dry in bug and rodent proof containers.
Comfort Foods:
Storing a sufficient amount of “comfort foods” is very important, to your psychological well-being as well as to alleviate “food-boredom” that is sure to set in after eating only storage foods for several months. Comfort foods are even more important if you have children or need to care for the elderly.
Consider comfort foods such as – Jell-O, instant pudding mix, cake mix, hard candies, chewing gum, Spaghettios, mac and cheese, brownie mix, canned spaghetti and meatballs, mashed potatoes, popcorn, cocoa, tea, coffee, powdered juice mixes, sunflower seeds etc. And remember to date and rotate on a FIFO basis.
We crave variety and having a supply of familiar comfort foods can go a long way toward retaining our sanity and self-worth during a long term disaster. You can only deny yourself for so long before desperation and depression start to set in. Life will be difficult enough – give yourself a treat. You deserve it.
It is a proven fact that if we are forced to eat foods we don’t want or the same foods for extended periods – just to stay alive – dissociation begins to set in. We begin to float away as an escape – we still eat to stay alive, but suffer a lack of focus and become disorientated in relation to our surroundings.
This is dangerous in a survival setting. Don’t think it can happen? Try eating nothing but beans and rice for three months and you’ll see what I mean. Having a supply of comfort foods can help by providing at least some form of normalcy to your life.
Older folks and children will have the hardest time adjusting to new or unfamiliar foods, with many refusing to eat altogether, especially if the food is unnecessarily bland or unappetizing. Comfort foods will help them cope.
Vitamins:
To ensure that you’re getting a sufficient amount of needed daily vitamins and minerals for optimum health, you need to stockpile a good multi-vitamin and mineral supplement. Also consider extra vitamin C and D. Vitamin D is of extra importance if you’re forced to stay inside (bugging in) for a longer than normal period of time and thus are unable to receive the needed vitamin D producing sunlight that is required for optimal health.
Don’t Forget about Your Pets:
Don’t forget to include a sufficient amount of food in your stockpile to feed your pets. A decent dog will increase your chances of survival because they can hunt and alert you to trespassers and other trouble. I prefer smaller dual-purpose breeds, with my choice for a working dog being the Jack Russell terrier.
A Sample Three Month Food Storage List for One Adult
- Wheat 75 Pounds
- Grains, rice, oats etc. 25 Pounds
- Canned meats 5 Pounds
- Canned margarine, powdered eggs etc. 2 Pounds
- Dried beans, peas, lentils, etc., 6 Pounds
- Dried fruit juice and concentrates 6 Pounds
- Dried fruits or canned 25 Pound (if dried, then equal to this fresh weight
- Comfort foods 3 Pounds
- Non-fat dried milk 25 pounds
- Peanut butter or substitute protein/fat source 3 pounds
- Dried potatoes 12 pounds (equal to this fresh weight)
- Salt 2 pounds
- Shortening oils 3 quarts
- Sugar or honey 12 pounds
- Canned or dried vegetables 9 pounds (if dried, then equal to this fresh weight)
Where to Put All this Food?
After reading the above recommendations, you’re probably asking yourself where in the heck, you’re going to store all of this food. Well, that’s a good question and one that you alone can answer for your situation better than anyone else, but I’ll make a few suggestions that I hope will point you in the right direction.
The absolute best place in an underground bunker, root cellar or basement, unfortunately, most people don’t have any of those and have to make due with other less ideal storage options… Consider a spare bedroom, attached garage, detached storage building on your property, or as a last-resort a nearby storage unit rental.
If at all possible put in an underground storage area of some sort to keep you storage foods safe (and you) safe from weather extremes, as well as the main enemy of your food-storage shelf-life; heat. An excellent option, and inexpensive when compared to other suitable alternatives is the buried shipping container.
How to Store Dried Beans and Grains at Home for Long-Term Storage with Oxygen Absorbers & Mylar Bags
I store all my grains, beans and other dry foods (besides sugar, salt or sprouting seeds) inside food-grade five-gallon plastic buckets. There is some controversy over what is and isn’t food grade. Most buckets with #2 inside a small triangle on the bottom are food grade, but not all – the only way to be reasonably certain is to contact the manufacturer and ask.I buy mine from the local hardware store in the paint department. They also have them at my Wal-Mart, but, I prefer to buy from local business owners if possible. Sometimes they can even be gotten free from bakeries and restaurants, just be sure they only held food products – not paint, chemicals or other things that can make you sick or dead.
Foods packed in oxygen don’t store as well as those in an oxygen free atmosphere. Oxygen absorbers work by removing the air from the enclosed container, leaving an atmosphere of 99% pure nitrogen in a partial vacuum inside the buckets.
Don’t open the bag of oxygen absorbers until ready to use because they will absorb oxygen from the surrounding air and become useless. Have everything ready to go before you open the package. Any unused oxygen absorbers can be stored inside a small canning jar until needed.
Be sure to have everything ready to go before you start. Line the inside of the bucket with an appropriately sized Mylar bag these will help to keep light and moisture out extending the storage life of the foods inside.
The Mylar bag also offers a layer of protection between the food and the plastic bucket, if for some reason the bucket that you’re using isn’t considered food-grade.
Pour the food into the buckets a little at a time, shaking each bucket as it is being filled to settle and distribute the contents. Fill each bucket to about ½ inch from the top and throw in one 2000 cc oxygen absorber in each five-gallon bucket of food.
Now to seal the Mylar bag – first roll the top of the bag closed on one end leaving an opening at the other and press out any air that has been trapped inside, next place a 2×4 across the top of the bucket and pull the Mylar bag over the 2×4 and seal with a clothing iron set at the highest setting in a typical ironing fashion across the board.
Quickly put the lids on each bucket and pound shut by laying the board across the top and striking with a hammer or rubber mallet. After a few hours, the absorbers will create a vacuum that will cause the lids on the buckets to “pop down” indicating a good seal and a proper atmosphere for long term storage. Be sure to label each with date, content, and weight, written on the front with a permanent marker.
Useful Resources and How-To Articles
- Augason Farms
- How To Get a Family of Four Prepped for The Coming Collapse – In The Quickest and Easiest Way Possible…
- 12 Must Have Prepper Tools For Surviving TEOTWAWKI
- The Prepper’s Guide to Surviving the End of the World, as We Know It: Gear, Skills, and Related Know-How
Seed Storage for Survival

We moved around quite a bit after meeting my wife and moving out of the little three bedroom. We never had the time or space for a garden until moving into our current house on 10 acres. Now I was ready to do it right. I plotted out 2,000 square feet and installed a fence all around it to keep out the critters. For the last several years we have spent hours a day working in the garden from March through September.
The garden has served as the primary project for our family during these months. It has been fun and provided plenty of exercise. It has also provided our main food source. We still hunt and fish for protein, but vegetables are on every plate. We started preserving our veggies by canning and drying them. We now have enough food stored that we would be fine for months without a grocery store.
However, there is another way that you can prep using your garden. Seed storage is the practice of saving and storing seeds from your vegetables at the end of the growing season. This serves a few purposes. It allows you to continue your garden into the next year without buying more seeds. It allows you to share seeds with friends and family to encourage them to prep as well. You can also create a seed bank. This collection of seeds is designed to provide a variety of food sources preserved for an uncertain future. If we have an economic collapse or farming is drastically affected by climate change, these seeds would allow you to start over.
Planning
First and foremost, you will have to make some adjustments to your garden before you can start saving your seeds. Your garden will need to be completely comprised of open-pollinated, non-hybridized, non-GMO seeds. This is because seeds that have been modified by the companies that sell them are designed to only be good for one season. These companies design the plants so that the first generation seeds will not germinate. This forces consumers to buy new seeds every year.However, if you use open-pollinated, heirloom seeds you will not have this problem. In order to start saving your seeds, you will have to make adjustments one year in advance. When you hit the store or web to purchase your seeds in the spring, be sure to pick up only heirloom seeds. Then you will actually have a viable product to save at the end of the season.
For your first season you will either have to purchase seeds from a commercial grower or have friends that can donate heirloom seeds to your garden. There are plenty of reputable online companies that can provide quality heirloom seeds for survival purposes. You might also want to consider a prepackaged seed bank that provides a variety of these seeds. Sometimes this is the most cost effective way to get what you need.
You should select which seeds to save based on two factors. The obvious one is to choose based on the fruits and vegetables that you are most likely to eat. There is no point in producing food that will go to waste. You also should start with the seeds that are easiest with which to work. These are going to be self-pollinated seeds.
Types of Seeds
Self-pollinated seeds are by far the easiest to store and grow. These include beans, tomatoes, peas, lettuce, chicory, and endive. Self-pollinated seeds are the easiest to work with because they do not have to be pollinated by another plant. The plant fertilizes itself with pollen from the flower moving to the stamen. This also eliminates the risk of cross-pollination or accidental hybridization. You should get exactly the same product year after year with these seeds.Wind and insect pollinated seeds are not so simple. They require a little more effort from the grower to keep the product pure. These plants can accidentally be pollinated by other plants located up to a mile away. This can create accidental hybridization that can ruin your veggies or fruit. The grower can either hand-pollinate the plants to prevent these issues, or they can create distance or barriers to prevent hybridization. Plants such as squash, radish, spinach, corn, and cucumber will produce seeds the same year if precautions are taken.
Where things get really complicated is when you get into biennial vegetables. These veggies do not produce a viable seed until the year after their first growing season. That means that you must overwinter the plants to ensure that they are still thriving the second year. Plants in this category include carrots, onions, cabbage, beets, leeks, celery, swiss chard, and turnips. For root vegetable in this category you cannot harvest the first year at all, so it takes some planning.
Drying and Freezing
Different types of seeds will last different lengths of time. For best storage you want to dry any seed down to less than 7% moisture and then keep it frozen in temperatures below 0 F. The lower the temperature, the longer the seed will last. Some will last over ten years, while others need to be used right away. For example, radishes must be used within a year. Peas, corn, and tomatoes typically last about three to five years. These are called Orthodox seeds.There are groups of seeds that must be planted quickly called intermediate and recalcitrant seeds. Recalcitrant seeds are tropical and include coconut, tea, and mangoes. They must be planted immediately. Intermediate seeds can be partially dried to save for a few months, but are not ideal for seed banks. These would include coffee and papayas.
Rotation
Many of us practice food rotation with our food storage. This means that we date our frozen foods and our canned goods and always use the oldest food first to keep from wasting any of it. This same principle must apply to seed banks. If you assume that the average seed will last four years properly frozen, then you can store seeds from four years of harvest. Then you need to plant the oldest seeds and save the rest. By annually planting your oldest seeds and bringing in a brand new batch, you ensure that your seeds will last as long as possible if you are forced to rely upon your seed bank.Remember that keeping the seeds frozen at a low temperature is paramount to maintaining their viability. If you are in a situation where power is limited, you must find a way to keep your seeds frozen. If you have a generator, using your power for this purpose is a good idea. If you do not have a consistent source of power, you have three options. You can either you’re your seeds to another location with a working freezer, you can trade them for other goods, or you can plant them.
In Conclusion
If you want to take your gardening efforts to the next level, seed storage for a seed bank is a great step. It takes lots of planning and a little bit of extra effort, but can make a huge difference with your SHTF strategy. Not only do you learn more about agronomics and save money on seeds, but you give yourself the opportunity to start a small scale vegetable farm if the situation requires it.Imagine if everything falls apart, yet you have the supplies to turn your whole property into a vegetable garden. Not only could you easily feed your family, but you would have plenty of supplies to can, dry, or freeze. You would also be able to trade your goods with others in the area to help improve your overall supplies. I hope we have given you enough reasons to do more research and decide if a seed bank is right for you.
10 Requirements for Long-Term Food Storage
 We
live in a world where a disaster is bound to hit us sooner or later.
Food storage is one of the basics of emergency preparedness and it
requires proper planning. No matter how you look at things, food will
always become your number one priority during a long-term disaster.
We
live in a world where a disaster is bound to hit us sooner or later.
Food storage is one of the basics of emergency preparedness and it
requires proper planning. No matter how you look at things, food will
always become your number one priority during a long-term disaster.Having a well-equipped pantry doesn’t necessarily make you a prepper. It has become a requirement of the times we live in. Food storage will make survival possible during an emergency scenario, may it be regional or national. Regardless of what your feelings towards preparedness are, you should at least have a week’s worth of food in your home.
For those planning for a long-term disaster, the food storage requirements are much more complex. There are a few things that need to be covered in order to make sure the food is still edible a few years from now. Here is what you should keep in mind when it comes to storing food.
10 Essentials for long-term food storage:
Keep it cool
Store it in the dark
Keep it airtight
A must read: Civil War Era Foods you can still make today
Think about what your family eats
Always rotate your stock
Buy cheaper and spread the cost
Store spice and seasonings
Related reading: How to dry herbs and spices
Don’t make it a one man effort
Think about water as well
Always have a backup plan
Food storage requires a lot of careful planning and investment. You will not be able to survive a long-term disaster without having the basics covered. Food storage becomes a main concern when you are preparedness like-minded. The requirements listed above will help you keep your pantry safe and will make sure your food lasts.
Other Useful Resources:
The Quickest Prepping Plan (Get Prepped in one trip to WALMART)Sold Out After Crisis (Best 37 Items To Hoard For A Long Term Crisis)
My Survival Farm (Project to build a survival garden that needs no watering or digging)
The LOST WAYS (The vital self-sufficiency lessons our great grand-fathers left us)
10 Awesome Tips You Never Knew About Using Wood Stoves That May Change Your Life
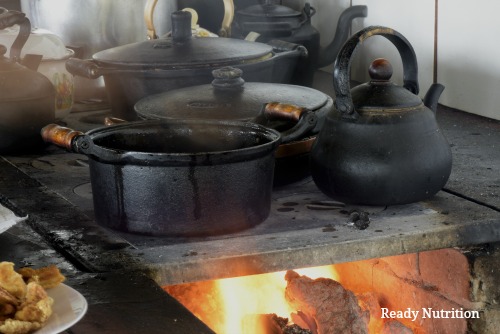
ReadyNutrition Readers, we’re having a heatwave out here in Montana…it’s 9 degrees Fahrenheit while I’m writing this. I hope you guys and gals are nice and warm and you have a good wood stove in front of you keeping it so. You recall I wrote one on wood stoves not too long ago, and I wanted to supplement this for a few more things you can do with yours. Aside from using wood stoves to stay warm and cook food on, here are a few tips you never knew on how to get the most out of your wood stove.
10 Ways to Make the Most of a Wood Stove
Ashes
One of the things you should consider is the potash that comes from your stove. Yes, all that wood turns into ashes that can be recycled and used. One of the things that you can do is to store them in a container (preferably a metal one that has a tightly-fitting lid) and use them later for producing your own soap. The ashes are boiled down in water (yes, this too can be done on your wood stove!), and combined with lye and other ingredients.Your ashes can also be used for metal polishing, for the likes of metals such as brass and silver. It works really well straight up, or mixed with just a few drops of water. The ashes can also be combined with your compost piles and used as a form of fertilizer to replace many valuable minerals and nutrients that comes from carboniferous materials being burned. Why do you suppose a new forest sprouts up in a few years after a forest fire? All of that burned wood goes into the soil and enriches it. You can turn it into your gardens when you’re planting in the springtime for the same effect.
Charcoal
Charcoal is another product that you can take from your wood stove. Used for a variety of things besides just cooking, charcoal can also be finely-crushed and added to your ash supply to make soap. It can be set aside for use as cooking material or a fire-starting ingredient and even used to clean teeth. Charcoal can also be used to filter water (see previous articles on water purification).Soot
There’s also soot from the chimney (although you’ll probably have to wait until springtime to obtain it when you brush your chimney pipe). Soot is the black substance formed by the combustion of your wood in the stove. This is fine particulate matter that adheres to your pipe walls, and is blackened, consisting mainly of carbon that has not been completely burned. Soot is responsible for many chimney fires. Soot can be mixed (in small quantities as needed) with a little bit of vegetable oil and some water to make your own ink. A type of soot is called lampblack, and is used in enamels, paints, and inks from a commercial perspective.That soot also has a great deal of unburned oils and resins in it (especially if you burn a lot of pine…don’t scoff…if you live in the Rockies, you will burn pine unless your last name is Rockefeller, believe me). The oils, resins, and unburned carbon are excellent to mix with things such as sawdust and lint, with some wax for fire starters for the wood stove or camping and backpacking.
Dehydrate Food
The top of the stove is great for dehydrating food as well. You have recipes from ReadyNutrition for pemmican and jerky. You can make your own on top of the stove with small-aperture wire racks…of the type to cool off hot sandwiches and the like. Lay your meat on top of the wood stove top on the racks and allow that heat to dry them right out.We’d love to hear any suggestions of things that you have found to do with your wood stoves (along with heating your home and cooking, of course). It is all part of your preps and homesteading and learning to economize and obtain the maximum use for all of the materials you have at your disposal. Explore some of these and let us know what you think, as well as things you have discovered on your own. Keep up that good fight, drink a good cup of coffee, and stay warm!
JJ
Mr. Johnson dries and tinctures a wide variety of medicinal herbs taken by wild crafting and cultivation, in addition to preserving and canning his own food. An expert in land navigation, survival, mountaineering, and parachuting as trained by the United States Army, Mr. Johnson is an ardent advocate for preparedness, self-sufficiency, and long-term disaster sustainability for families. He and his wife survived Hurricane Katrina and its aftermath. Cross-trained as a Special Forces Engineer, he is an expert in supply, logistics, transport, and long-term storage of perishable materials, having incorporated many of these techniques plus some unique innovations in his own homestead.
23 Survival Uses for Honey that You Didn’t Know About

Types of Honey
While you may be thinking solely of the little grocery store bears, there are literally thousands of different types of honey. We’ll go over some of the varieties noted for their health benefits.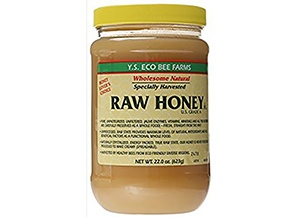 Raw Honey:
This type of honey is lightly processed, unpasteurized, and unfiltered. It tends to be darker in color than most grocery store honey and may contain particulates of pollen and wax. You can buy raw honey from local beekeepers. Many types of honey would be classified as raw.
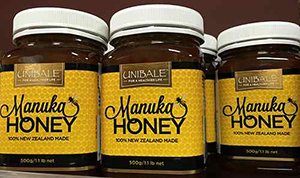 Manuka Honey
This type of honey is made from the Manuka bush in New Zealand and is so noted for its healing properties that it has garnered approval in a brand name form from the FDA as topical medication for wound care. It is filtered by UV light for sterilization purposes to retain its healing properties.
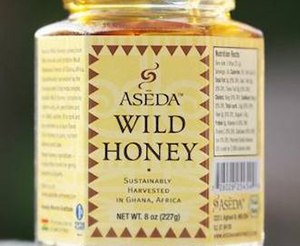 Wild Honey:
Made by bees in the Peruvian rain forests, this honey is prized the world over for its wellness purposes. Dark amber in color and much thinner than the above named honeys, wild honey is much less sweet than most other honeys.
Other Varieties:
Other common varieties of honey are based solely upon the plant pollen’s they’re made from, including clover, alfalfa, avocado, and blueberry. Wild flower honey is a catch-all term frequently used for honey of unknown origin. It comes in many forms including liquid, honeycomb, cut comb, whipped, and crystallized.
Survival and Wellness Uses for Honey
- Supplies Antioxidants – Antioxidants help reverse the damage done to your body by lifestyle or environmental conditions, and many types of honey contain high levels of them.
- Wound Healing – Honey is well-known for helping
wounds heal. Manuka honey is commonly used for this purpose. Honey is
perfect for this usage in a SHTF situation, simply due to the fact that
it’s available in the wild and works exceptionally well.
- Soothes Sore Throats – In hot tea with lemon or all by itself, honey can help soothe a sore throat.
- Relieves Cough – Honey has been shown to be as effective as many OTC cough syrups without the nasty side effects associated with that type of medication. A spoonful may eliminate the urge to cough.
- Helps End Constipation – Honey has mild laxative properties that may help relieve mild constipation.
- Soothes Upset Stomach – Honey coats the stomach and contains nutrients and enzymes that may help eliminate nausea.
- Gut Balancing Powers – The antibacterial properties of honey may help keep bad gut bacteria in check, allowing good bacteria to prosper. One example of this balance is peptic ulcer-causing H. Pylori levels decreasing with the consumption of a couple teaspoons of honey on an empty stomach.
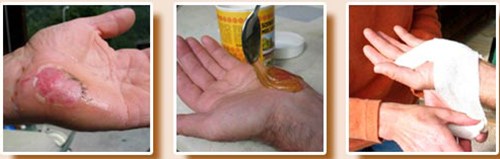
- Burn Care – Honey works great to both heal mild burns and keep them from getting infected. Simply apply it to the burn and cover with a bandage.
- Lessens Allergy Symptoms – Raw local honey is thought to help alleviate seasonal allergies by introducing the pollens that cause the reaction directly into the body. Think of it as exposure therapy that tastes good!
- Aids Sleep – It’s thought that a spoonful of honey provides your brain with the fuel it needs to get through the night, thus helping you get to sleep and stay that way.
- Dandruff Cure – Honey diluted 10:1 with warm water can help eliminate unsightly, itchy dandruff, studies show. It’s thought this effect is due to honey’s antibacterial, antifungal, and anti-inflammatory properties.
- Provides Energy – Honey contains lots of unprocessed sugar, which mean lots of carbohydrates. Carbs equal energy.
- Aids Digestion – It’s thought the enzymes present in honey may help you digest food more effectively.
- Weight Loss – The digestive benefits listed above are thought to help aid in weight loss. Despite the fact that honey contains lots of sugar, which is not ideal in most diets, the enzymes are said to help break up fat stored in your body for energy.
- Workout Recuperation – Honey can help your muscles and joints recover after a workout due to the nutrients and glucose it contains.
- Acne Treatment – Raw honey applied directly to acne spots may help to improve the look and feel of acne marks and decrease healing time. Used regularly in a cleanser, it can help eliminate the bacteria that cause acne.
- Blood Sugar – Honey is thought to be better at maintaining blood sugar levels than other more processed sweeteners. This may be due to honey’s unique glucose/fructose ratio.
- Moisturizing – Honey is great at moisturizing skin, which can become important in many survival situations.
- Soothes Skin Abrasions – Honey can help wounds, scrapes, and burns to feel better as well as heal better, decreasing discomfort associated with broken skin.
- Cold care – Honey can be used to soothe inflamed membranous tissues like the nasal passages when a cold is coming on.
- Wild Sweetener – Honey is, if absolutely nothing else, a sweetener that’s available nearly all over the world in the wild. Commercial sugar and other substitutes could be difficult to come by in a survival situation, but honey is always there if you know how to find, harvest, and process it.
- Parasite Elimination – A mixture of vinegar, water, and honey can help to rid the body of parasites that could be harmful.
- Contains Phytonutrients – Honey has lots of nutrients from the plants it’s made from. Nutrients support all of your body’s systems.
Storing Honey
For short-term storage, honey should be stored at room temperature in a dry, dark place like a cupboard. A secure lid is important to keep out contaminants.Honey is actually great for long-term storage because it can be used indefinitely. The short term directions still apply, though you might consider keeping honey on the lower end of room temperature to keep it from potentially fermenting. A root cellar would be perfect for long-term storage.
If you see crystals have formed in stored honey, there’s no need to worry. Simply place the container to simmer in warm water and the crystals will dissolve. The crystals indicate that the honey has lost some of the liquid it initially contained.
